What do you do when you have something like this? Do a DIY upholstered bench tutorial and play with your favorite fabrics! I snagged it this last weekend for about $10 and thought it was the perfect size for Lauren/guest bathroom.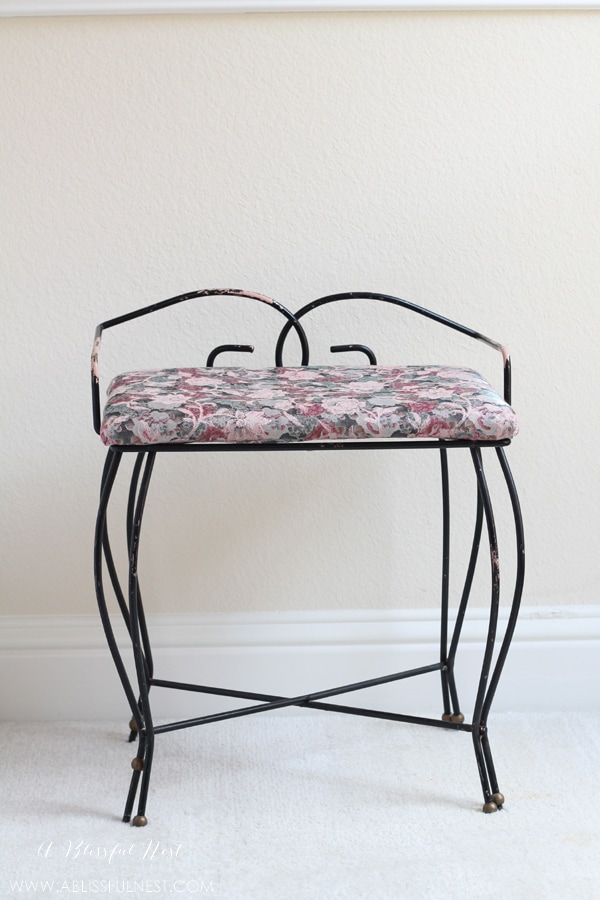
The bathroom walls are a french blue and the tile is tones of grey. So I went to my trusty stash of remnant fabrics and pulled a handful out that I thought might work.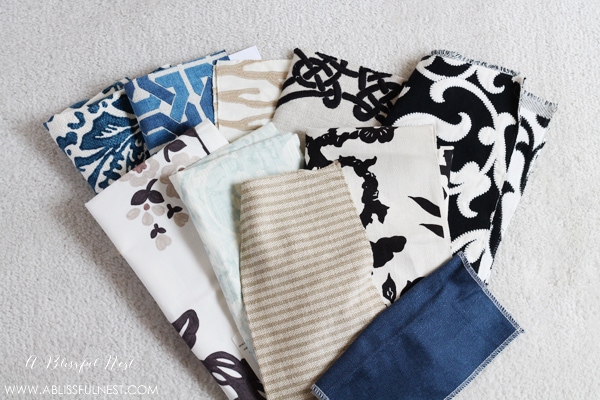
I love when I asked you guys which one to pick and most of you picked the one I did. The beautiful blue and white GP & J Baker fabric.
Isn’t it just gorgeous finished??!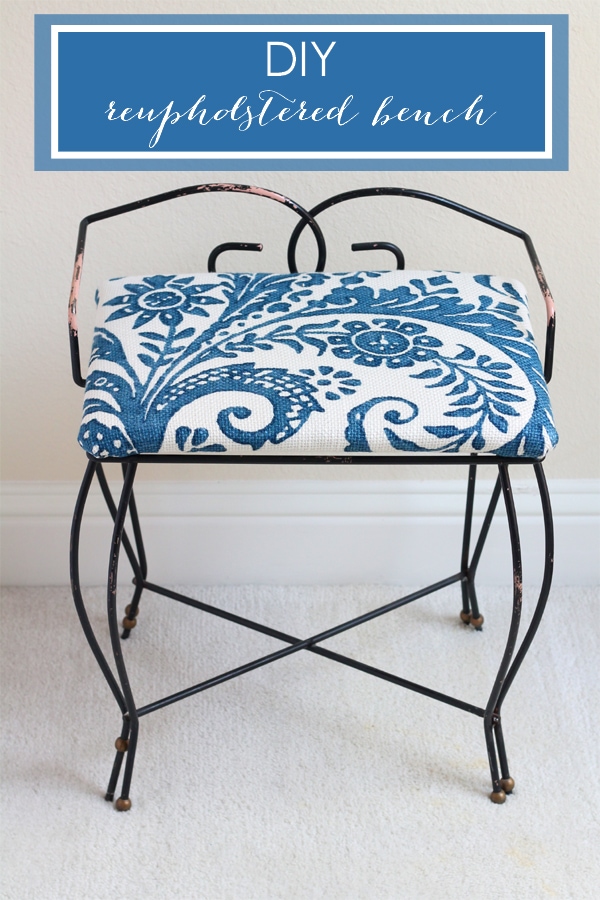
Here is what you need for this simple project:
-thrifted bench
-1 yard of fabric (I used a piece of remnant fabric)
-staple gun
-scissors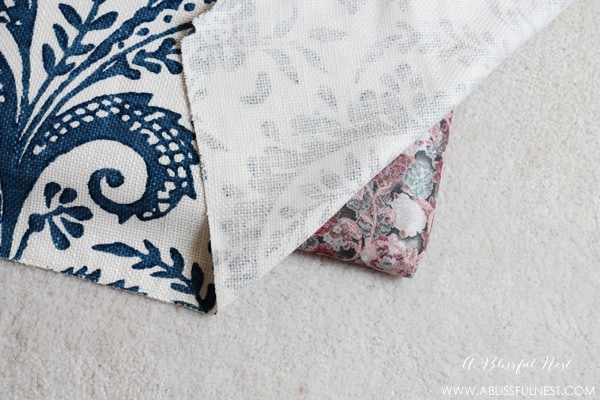
Step 1: Take off the old fabric. If you are starting from scratch then lay padding on your piece of wood that is cut to the size you need. Then lay your fabric over the top and line up your design.
If you already have a seat made then layout your fabric and position the seat where you want the fabric to lay. 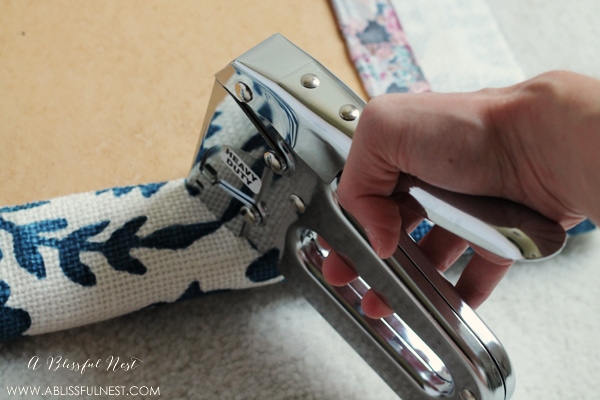
Step 2: Fold over the edge of 1 side and start 1″ in stapling the fabric to the wood. Leave the corners for last, and do this to all sides. 
Step 3: Fold in your corner as above and staple in place. 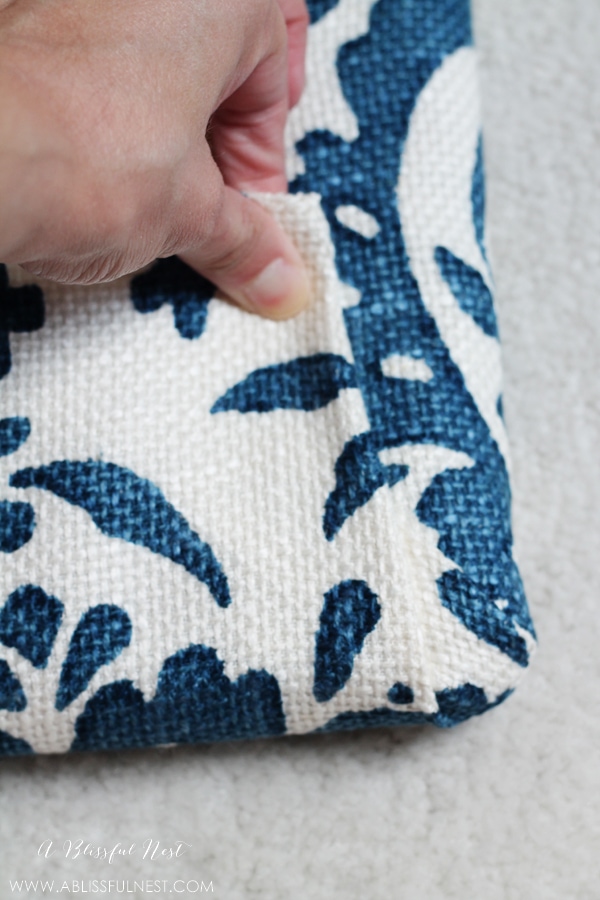
Step 4: Then fold up the other edge so it looks like this and staple in place. Secure all edges following the last 2 steps. 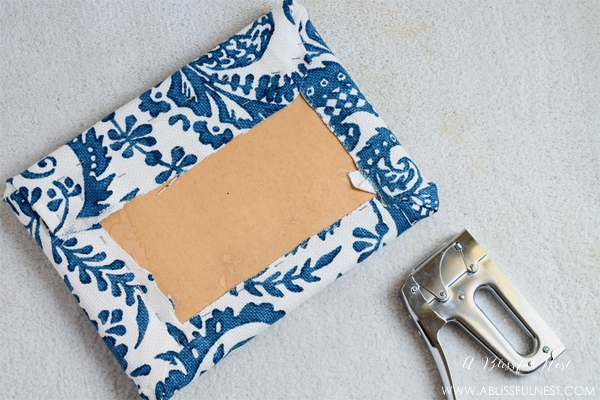
Step 5: This is what it should look like when you are complete. Now to really be professional, you would then take a piece of plain duck fabric and fold/iron those edges to it’s underside and staple to the bottom of your seat to give it a finished look. Of course I have no patience and just wanted to get it set up as soon as I could to admire it! 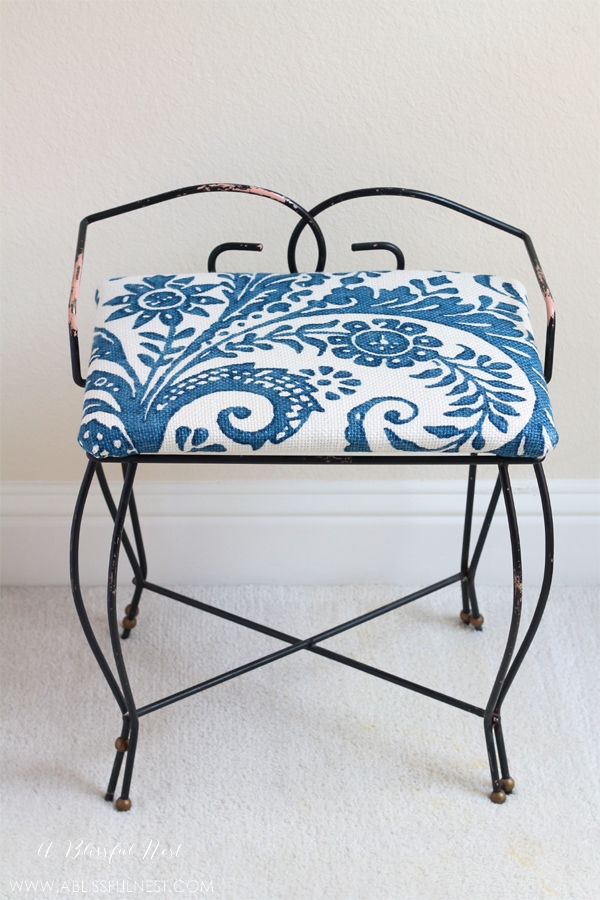
And here you go! Oh my goodness how I love it!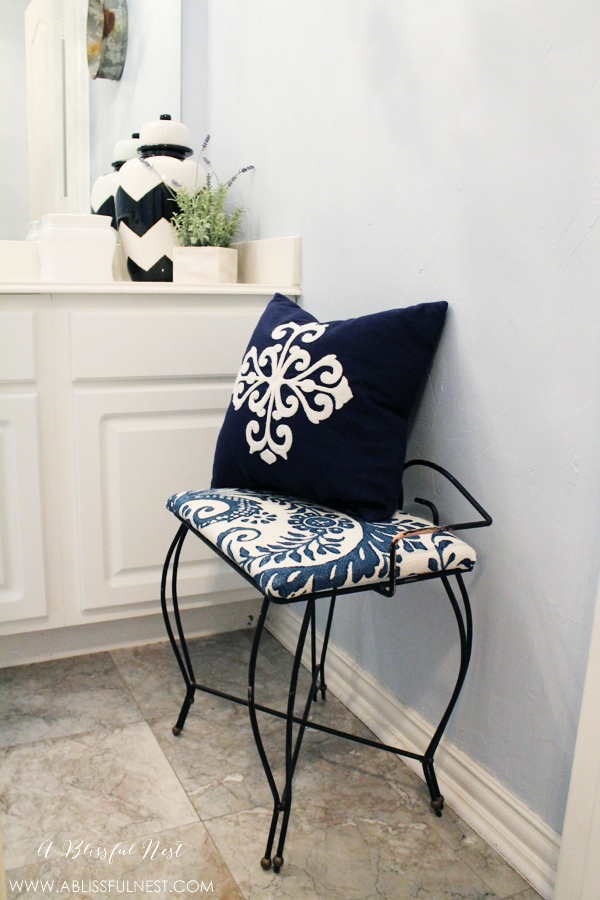
I think it is perfect for this room and Lauren uses it to put her shoes on in the morning. She also typically has her stuffed animals arranged on it but I think it looks better with this cute pillow. PS- can you see the cute doggie nose in the bottom picture?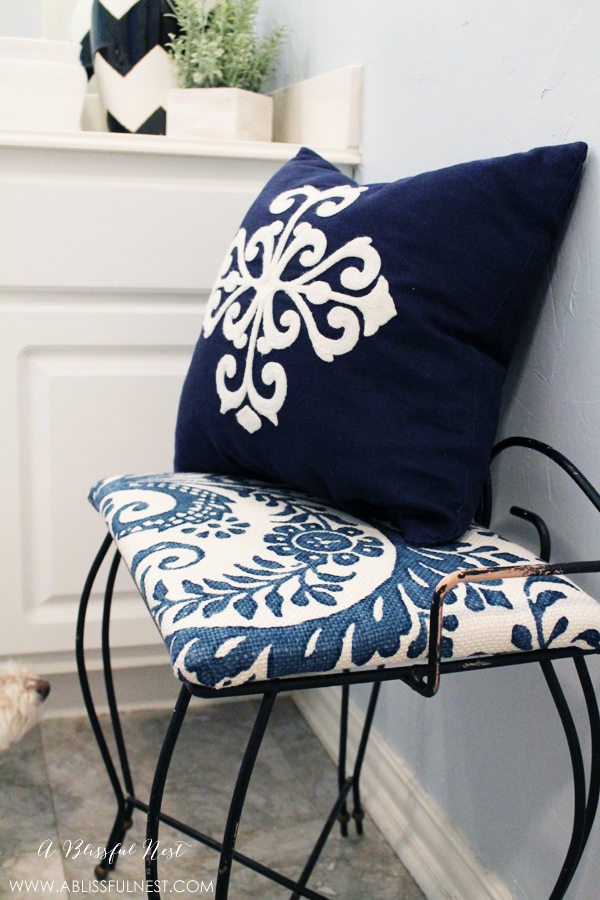 Okay so don’t go telling my upholsterer how great this turned out because he wont do me any favors in the future or he may just tell me to join the guys in the back and help out! Just kidding!! I think this is the easiest diy upholstered bench ever. Right up my ally on tutorials. What do you think??


Thanks for sharing your project at the Say G’Day Saturday linky party. I just pinned your post to the Say G’day Saturday Board and will be featuring you this week too!
Best wishes,
Natasha in Oz
It looks amazing!! I am awful about doing projects like this. They always look so great when other people do them…but when i try, it looks like…well, it looks like I did it myself. lol.
Pinned!
Thanks for linking up at Wordy Wednesday!
That looks great, lovely fabric. Thanks for linking up to Sweet and Savoury Sunday, stop by and link up again. Have a great day!!
This turned out gorgeous! I love the fabric:)
love the fabric. This looks great. Hugs!
Me too! It is one of my favs!