


Learning step-by-step artificial flower arranging for beginners can feel confusing when most guides skip over the basics you actually need to know.
Decorating with artificial flowers should feel fun and creative, but many beginners feel stuck before they even choose their first stem or vase.
You might have tried following a tutorial online only to end up with something that looks stiff, unnatural, or just plain wrong somehow.
Maybe you bought beautiful fake flowers with so much excitement, but arranging them felt harder than you ever imagined it would be at first.
The problem is that most guides assume you already know things like how to trim stems or where to place your tallest flowers.
Beginners often feel discouraged because their arrangements look messy or crowded, and they cannot figure out exactly what went wrong with the design.
You start wondering if you are just not creative enough, or if maybe artificial flower arranging is harder than it seems for everyone.
This post may contain affiliate links. As an Amazon Associate and a participant in other affiliate programs, I earn a commission on qualifying purchases at no additional cost to you.

But the truth is, artificial flowers arrangement ideas are actually easy once someone breaks it down into simple steps without any pressure.
So, let me walk you through everything clearly and without skipping any important details.
Why Try Artificial Flower Arranging as a Beginner?
Artificial flower arranging for beginners is honestly one of the best ways to start exploring your creative side without any stress or worry involved.
You get to work at your own pace, rearranging stems as many times as you want until everything looks exactly the way you imagined.
There is no pressure about flowers wilting or dying before you finish, so you can take breaks and come back whenever you feel ready.
Fake flower arranging for beginners builds confidence because you can experiment freely, try new ideas, and learn what works without wasting money on fresh blooms.
You also get to keep your beautiful creation forever, enjoying it in your home for months or even years without any maintenance at all.
Different types of artificial flowers let you practice design skills like balancing colors and heights, giving you experience that helps with any kind of decorating project later.
Beginners love that artificial arrangements stay looking fresh and pretty, so your hard work does not disappear after just a few short days pass.
You can create arrangements for any season or holiday without worrying about what is currently blooming or available at your local flower shop.
Learning with silk flowers means no mess, no water spills, and no dying petals dropping all over your table while you are working.
Starting your flower arranging journey with artificial blooms gives you the freedom to explore, make mistakes, and discover your own unique style beautifully.

What You’ll Need to Start Your First Faux Flower Arrangement
Getting started with your first beginner artificial flower arranging project does not require a lot of fancy supplies or expensive tools at all.
You probably already have some basic items at home that will work perfectly for creating simple and beautiful faux flower arrangements right away.
So here are the supplies and tools you need, so you can gather everything and feel completely prepared on how to decorate a home with artificial flowers.
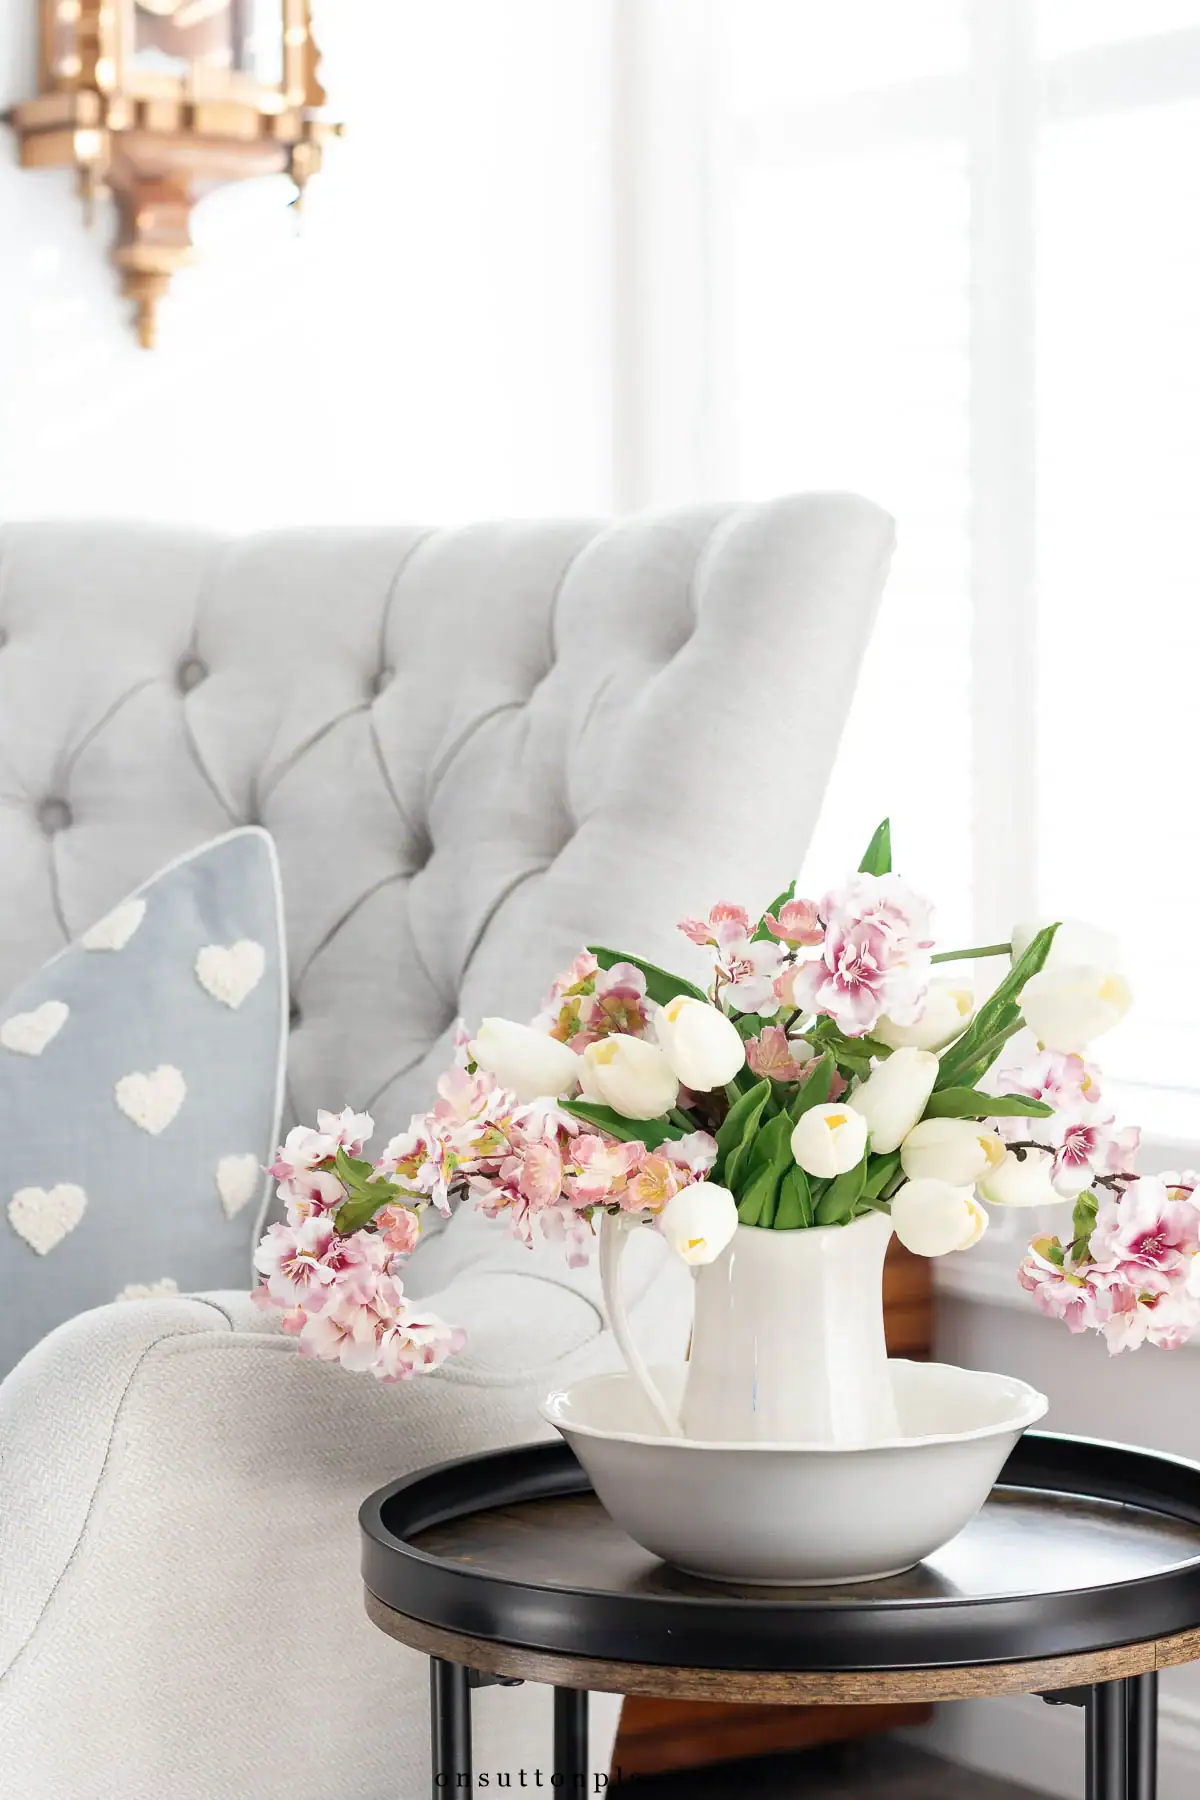
Tap Photos To Shop

How to Choose Artificial Flowers for Arranging
Choosing the right artificial flowers makes your beginner flower arranging guide experience so much easier and more enjoyable from the very first moment.
Start by picking flowers in colors that already match your room or space, because this helps everything feel coordinated and intentional without much effort.
Look for flowers in different sizes, mixing larger blooms with smaller ones so your arrangement has variety and visual interest that catches the eye.
Pay attention to the shapes of each flower, combining round blooms with spiky or delicate ones to create texture and dimension in your design.
Touch the petals and leaves to check the texture, making sure they feel soft and realistic instead of shiny, stiff, or plasticky looking.
Check that the stems are flexible enough to bend and trim easily, because this makes positioning and arranging your flowers so much simpler.
Beginners should start with flowers that have wire stems inside, as these are the easiest to adjust, shape, and secure in any container.
Choose a few greenery pieces like leaves or filler stems, because these help fill empty spaces and make your arrangement look fuller and finished.
Avoid buying too many flowers at once for your first project, since three to five stems are plenty to create something beautiful and balanced.
Trust your instincts and pick flowers that make you smile when you look at them, because that joy will shine through in your arrangement.
More Faux Flower Decorating Ideas + Inspiration
Basic Design Rules for Artificial Flower Arranging
Understanding basic design rules for artificial floral arranging basics helps beginners create arrangements that look natural, balanced, and professionally done without feeling overwhelmed at all.
Start by thinking about balance, making sure your arrangement does not lean too heavily to one side or look lopsided when you step back.
Create height variation by placing your tallest flowers in the center or back, with shorter blooms and greenery filling in around the edges.
Every arrangement needs a focal point, so choose one or two larger flowers to be the stars while smaller blooms play a supporting role.
Space your flowers out naturally instead of bunching them all together tightly, because real gardens have breathing room and movement between each bloom and stem.
Aim for an odd number of main flowers like three or five, as this creates visual interest and feels more organic than even numbers.
Angle some flowers slightly to the side or forward instead of making everything face straight ahead, because this adds depth and makes arrangements interesting.
Layer your flowers at different depths, with some blooms sitting closer to the front and others tucked further back to create that beautiful, dimensional look.
Use greenery and filler flowers to soften harsh lines and fill gaps, helping your arrangement feel complete, lush, and naturally put together without trying.
Keep colors cohesive by choosing blooms in the same color family or complementary shades, as too many different colors can feel chaotic for beginners.
Step back often while you work to check the overall look from a distance, because this helps you spot any areas that need adjusting.

Common Artificial Flower Arranging Mistakes Beginners Should Avoid
One of the biggest mistakes beginners make is leaving all the stems perfectly straight, and this makes arrangements look stiff, unnatural, and obviously fake.
Would you like to save this post?
Another common problem is cramming too many flowers into one container, creating a crowded look where individual blooms cannot be seen or appreciated properly.
Many beginners forget to trim stems to different lengths, so everything sits at the same height and the arrangement looks flat instead of dimensional.
Using only flowers without any greenery or filler is a mistake because those extra elements help soften the design and make it feel complete.
Some people place all their flowers facing straight forward like soldiers in a line, but real flowers naturally turn and angle in different directions.
Choosing the best artificial flowers that are all the same size creates a boring arrangement without visual interest, so mixing different bloom sizes is always really important.
Beginners sometimes skip fluffing and adjusting petals and leaves, leaving them smashed or bent from packaging, and this ruins the realistic look you want.
Ignoring the container color and style is a mistake because your vase should complement your flowers instead of clashing or competing for attention visually.
Many people give up too quickly when their first attempt does not look perfect, but knowing how to arrange faux flowers takes practice and patience to develop skills.
Forgetting to step back and view your arrangement from different angles means you might miss gaps, balance issues, or spots that need a little adjusting.

Step-By-Step Artificial Flower Arranging For Beginners
This artificial flower arrangement tutorial breaks down the entire process into easy steps that anyone can follow, even if you have never arranged flowers before.
Each step builds on the last one, so you will feel confident and guided through the whole process without any confusion or guesswork involved.
Just take your time, follow along, and remember that practicing these simple steps will help you create beautiful arrangements every single time you try.
Step 1: Prepare Your Flowers and Workspace
Start by unpacking all your artificial flowers and greenery, then gently fluff and separate each petal and leaf so everything looks natural and full.
Lay out all your materials on a clean table or workspace where you have plenty of room to spread out and see everything clearly.
Trim any plastic tags or stickers off the stems, and give each flower a little shake to remove any dust or debris.
Step 2: Choose and Prepare Your Container
Select a vase or container that is the right size for your flowers, keeping in mind that the arrangement height should be about one and a half times the container height.
Clean your container if needed, then decide whether you want to add floral foam, rocks, or marbles inside to help hold stems in place.
If using foam, cut it to fit snugly inside your container, leaving about an inch of space at the top for easier stem insertion.
Step 3: Start With Greenery as Your Base
Begin by placing greenery stems around the edges of your container first, creating a natural foundation and frame for your flowers to nestle into later.
Trim the greenery stems to different lengths so some sit lower and others reach higher, giving your arrangement depth and a fuller appearance overall.
Angle the greenery slightly outward and in different directions so it looks loose, natural, and not too stiff or perfectly symmetrical at all.

Step 4: Add Your Tallest Focal Flowers
Choose your largest or most beautiful flower as the focal point, then place it slightly off center or in the back at the tallest height.
Add one or two more tall flowers nearby, but at slightly different heights, so you create visual interest instead of a flat, straight line.
Make sure these focal flowers face slightly different directions so the arrangement looks natural and interesting from multiple angles when people walk around it.
Step 5: Fill In With Medium Height Flowers
Add your medium-sized flowers around and between the tall focal blooms, trimming stems so these flowers sit a bit lower than your tallest ones.
Place these flowers at different depths, with some closer to the front, and others tucked back, to create that beautiful layered, dimensional look you want.
Turn and angle these blooms in various directions, just like real flowers would naturally grow, instead of making everything point straight forward stiffly.
Step 6: Add Small Flowers and Fillers
Tuck smaller flowers and delicate filler stems into any gaps or empty spaces, using them to soften the arrangement and create a lush finished look.
These little blooms should peek out between larger flowers, adding texture and visual interest without competing for attention or overwhelming the focal points you created.
Vary the placement depths and angles just like you did with larger flowers, so everything feels cohesive, balanced, and naturally arranged throughout.

Step 7: Step Back and Make Adjustments
Take a few steps back from your arrangement and look at it from different angles to see if anything feels unbalanced or needs adjusting.
Check for any obvious gaps, crowded spots, or areas where stems are too visible, then add more greenery or filler to fix these issues.
Gently bend and adjust individual flower heads and leaves until everything looks natural, balanced, and exactly the way you want it to appear.
Step 8: Final Touches and Placement
Give all your flowers one last fluffing, making sure petals and leaves look soft, natural, and not squished or bent in any awkward directions.
Clean any visible foam or mechanics at the base by tucking in extra greenery, or add decorative moss or rocks to hide these elements.
Place your finished faux flower arrangement in its permanent spot, turning it so the best side faces forward, where people will see it most.

Frequently Asked Questions
What is the easiest way to arrange fake flowers?
The easiest way is starting with greenery first to create your base, then adding your tallest flowers in the center or back before filling in with smaller blooms and fillers around them.
Do you need floral foam for artificial flowers?
You do not absolutely need floral foam for artificial flowers, but it does make arranging easier by holding stems securely in place exactly where you want them positioned throughout your design.
How many flowers do you need for an arrangement?
Most beginner arrangements look beautiful with three to seven main flower stems plus greenery and fillers, though the exact number depends on your container size and the flower sizes.
How do you keep artificial flowers from looking fake?
Keep artificial flowers looking realistic by fluffing petals carefully, varying stem heights and angles, mixing in greenery, and choosing quality flowers with soft textures instead of shiny stiff ones.
What flowers should beginners start with?
Beginners should start with sturdy flowers like roses, hydrangeas, or sunflowers because these blooms are forgiving to work with, look beautiful easily, and have flexible wire stems for adjusting.
You now have everything you need to create beautiful artificial flower arrangements that look natural, balanced, and absolutely stunning in your home or anywhere else.
This step-by-step artificial flower arranging for beginners guide was designed to make the whole process feel easy, approachable, and fun instead of stressful.
Remember that every arrangement you create helps you learn something new, building your confidence and skills a little more each time you practice together.
Do not worry about making everything perfect on your first try, because the beauty of faux flowers is that you can adjust and rearrange them.
I truly believe you are going to surprise yourself with how creative and talented you are, so go grab some flowers and start creating something beautiful.

