


If you have been looking for a simple and affordable way to get organized, command hooks might be the most useful thing in your home.
When you start exploring home organization ideas, it does not take long to realize how much these little hooks can actually do.
So many people have walls full of holes from nails and screws just because they needed a simple place to hang something.
Renters especially know the frustration of wanting to hang things up without risking their security deposit or damaging the walls.
It can also feel tricky to figure out exactly where to use them and whether they will actually hold up over time.
The good news is that with a little know-how, these small adhesive hooks can completely change how organized and functional your home feels.
You do not have to drill a single hole or spend a lot of money to get your home feeling tidy and pulled together.
This post may contain affiliate links. As an Amazon Associate and a participant in other affiliate programs, I earn a commission on qualifying purchases at no additional cost to you.

So, I’m going to walk you through the best surfaces to use them on, how to apply them correctly, and how to remove them safely.
I’m also going to share 15 creative and practical ways to use adhesive hooks all throughout your kitchen, bathroom, bedroom, and beyond.
Grab my favorite command hooks and use my tips to help your home feel more organized and functional.
Why Command Hooks Are Better Than Nails Or Screws
Nails and screws leave permanent holes in your walls, and fixing those holes later takes time, money, and more effort than most people expect.
Command hook ideas solve that problem completely because you get all the functionality of hanging storage without any of the damage left behind afterward.
Damage-free hanging is especially important for renters who need to keep their walls in good condition throughout the entire length of their lease.
Even homeowners who plan to repaint or redecorate later will appreciate not having to patch and sand dozens of tiny holes all over their walls.
Command hooks are also incredibly easy to reposition, so if you hang something and decide you want it somewhere else, moving it is simple and stress-free.
Nails and screws require tools, a steady hand, and at least a little bit of experience to get right without making a mistake in your wall.
Adhesive hooks for walls go up in seconds and hold surprisingly well when you follow the prep and application steps correctly from the very start.
The ability to hang, move, and remove without any tools or wall damage makes command hooks one of the smartest and most versatile home organization purchases you can make.

What Surfaces To Use Command Hooks On
Command hooks work best on smooth, clean, and non-porous surfaces, so knowing where to place them helps you get the strongest and longest-lasting hold.
Painted walls are one of the most common surfaces people use them on, and they work really well as long as the paint is fully cured and clean.
Smooth tile is another great surface for command hooks, making them a popular and practical choice for kitchens and bathrooms throughout the home.
Glass surfaces like mirrors and shower doors hold adhesive hooks surprisingly well and are a great option when wall space is limited or unavailable.
Renter-friendly wall hooks work especially well on metal surfaces like the inside of lockers, filing cabinets, and even the side panels of refrigerators.
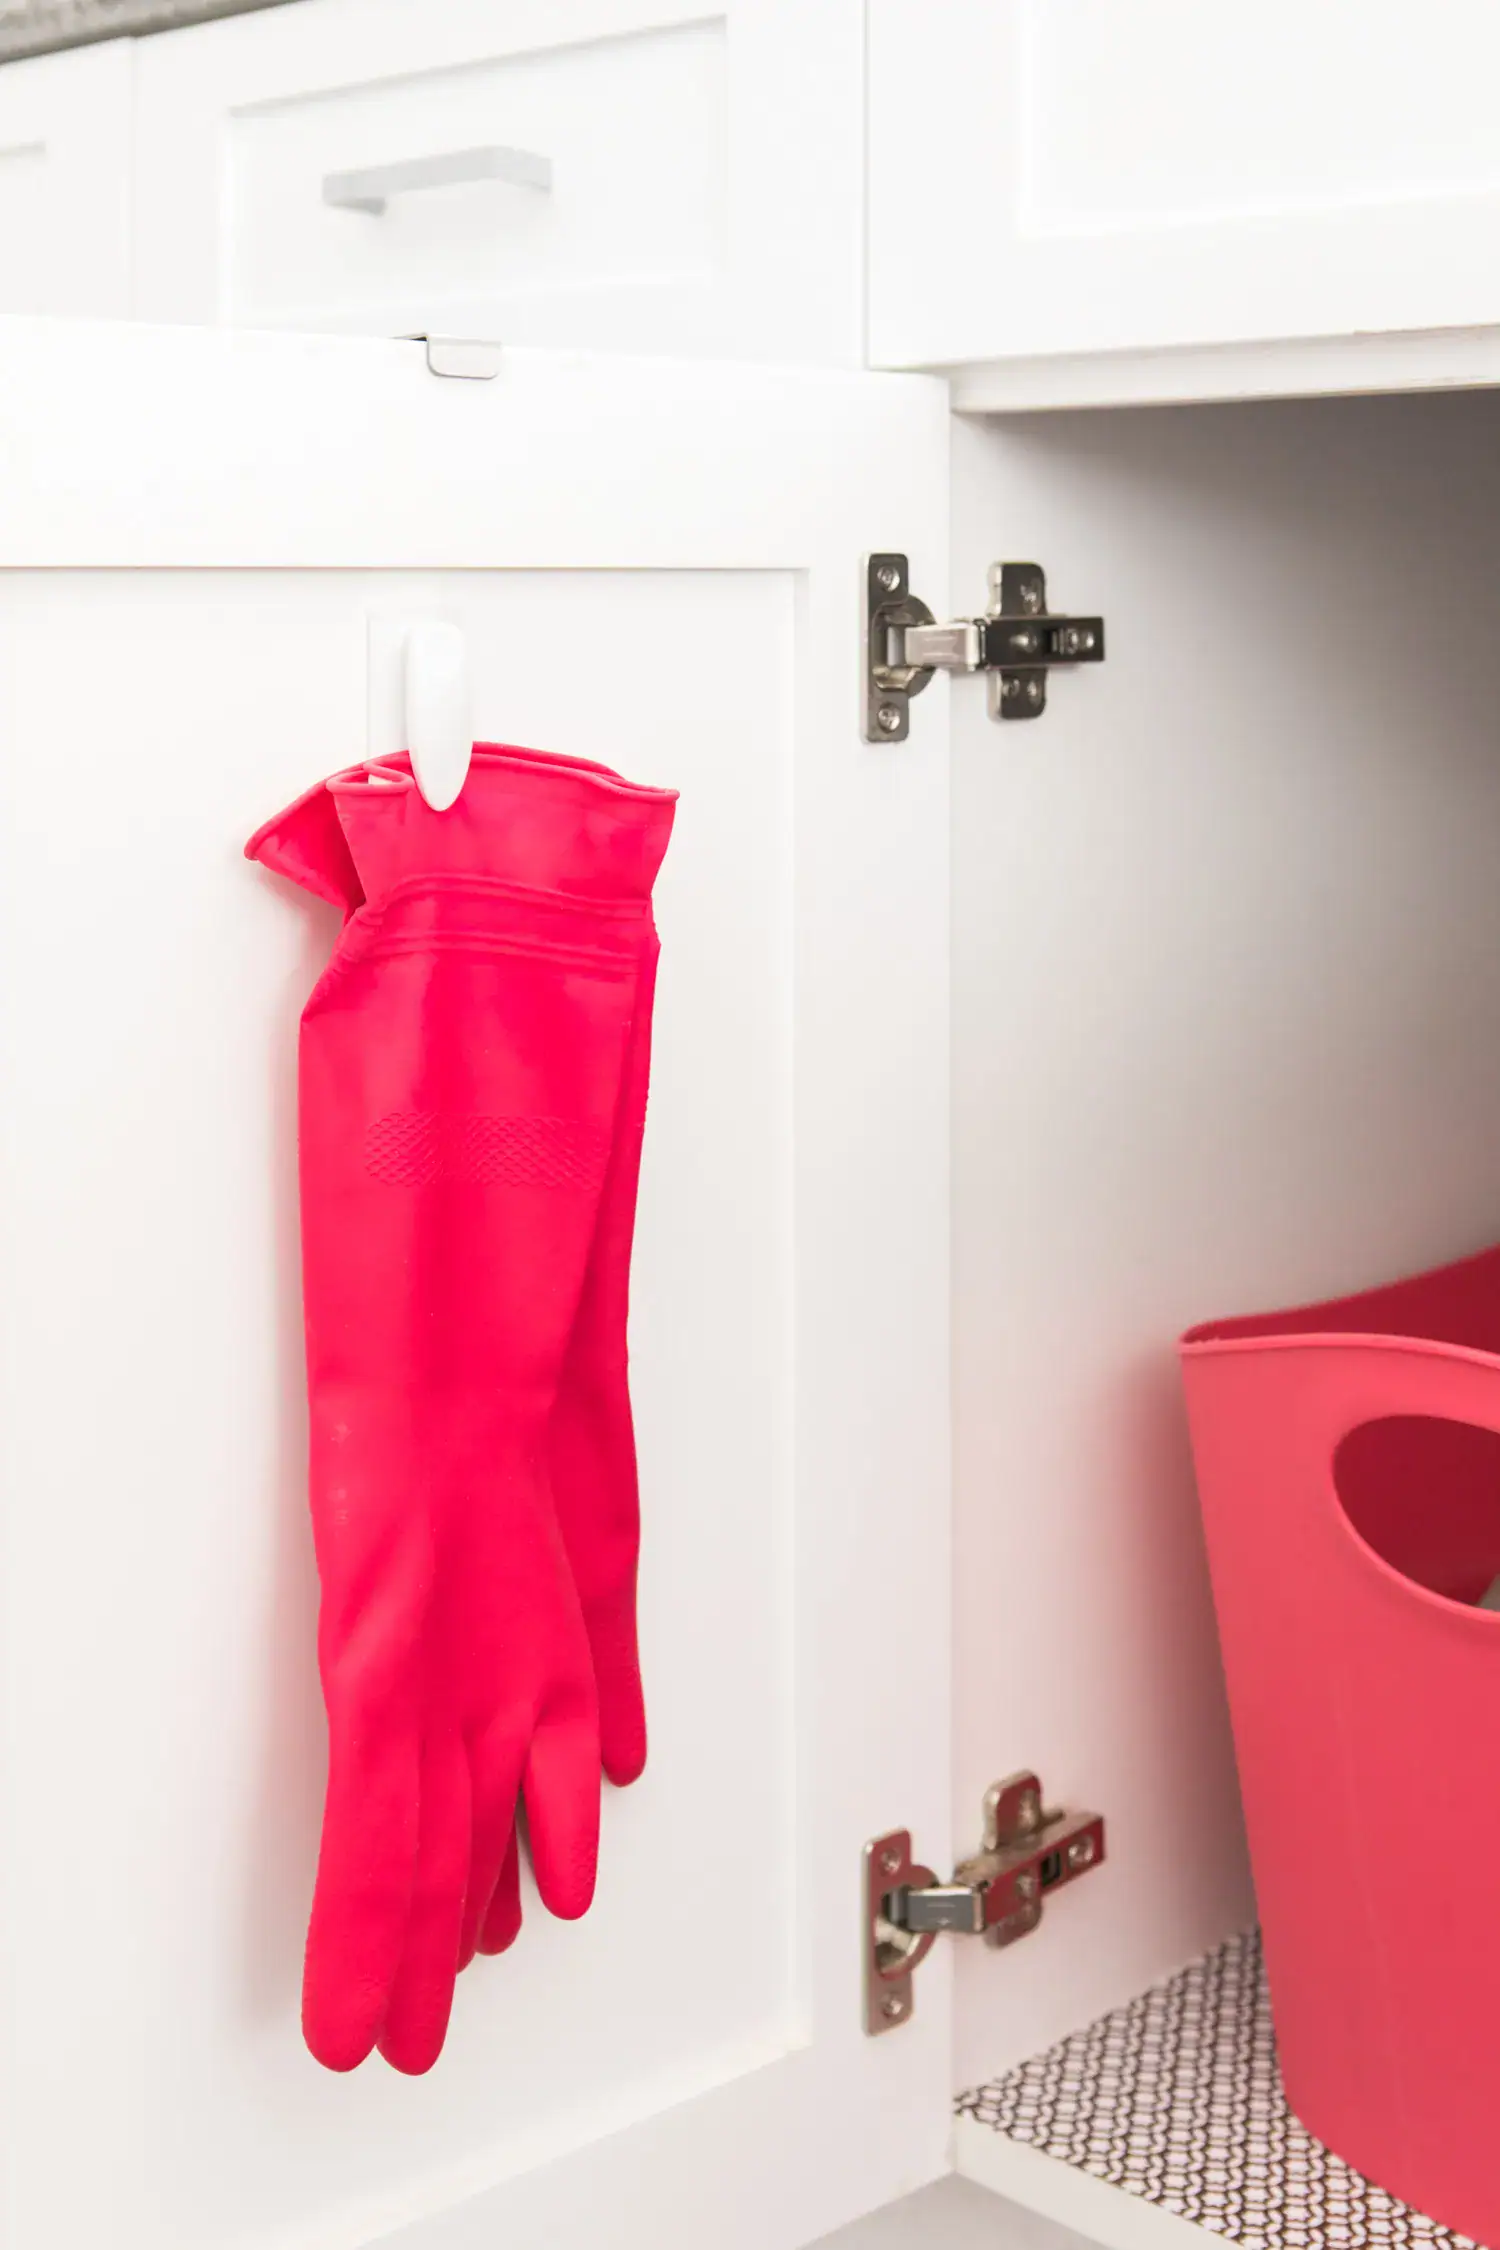
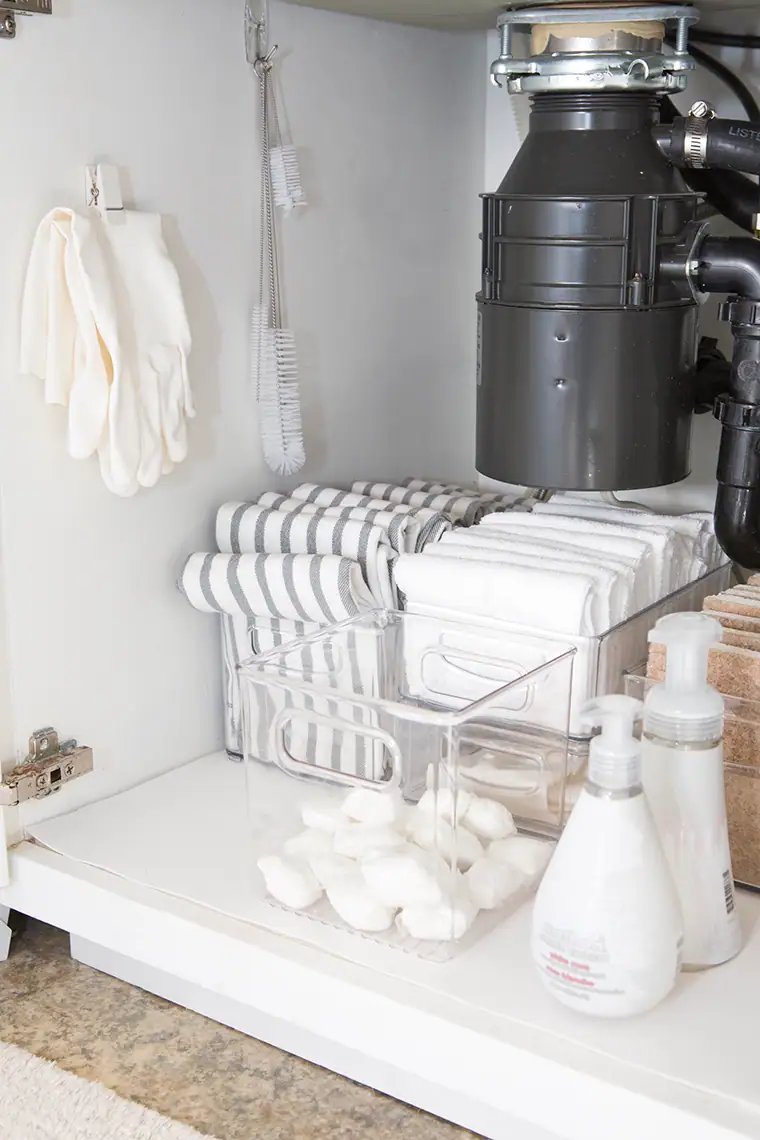
Finished wood surfaces like cabinet doors and the sides of bookshelves are also reliable spots where command hooks tend to grip and hold firmly.
There are some surfaces where command hooks simply do not perform well, and those include brick, rough concrete, unfinished wood, and wallpapered walls.
Always check the packaging for weight limits and surface recommendations before applying your hooks so you get the best possible results every single time.
My Favorite Command Hooks To Use
There are so many different styles and sizes of command hooks out there, and finding the right ones for your specific needs makes such a big difference in how well they work.
Not all hooks are created equal, and some are genuinely so much better than others when it comes to hold strength, appearance, and overall versatility around the home.
So here are my personal favorite command hooks so you can shop with confidence and know exactly what to look for.
Tap Photos To Shop

How To Prep A Wall So Command Hooks Stick Better And Last Longer
Prepping your wall correctly before applying a command hook is honestly the single most important step for making sure it holds up well.
Start by wiping down the surface with a clean cloth and a little rubbing alcohol to remove any dust, grease, or residue left behind.
Skipping the cleaning step is the number one reason command hooks fail early, so please do not rush past this part of the process.
Let the surface dry completely after cleaning because applying a hook to even a slightly damp wall will seriously weaken the adhesive bond right from the start.
Avoid using household cleaners or sprays in place of rubbing alcohol because many of them leave behind a slippery residue that prevents the adhesive from gripping properly.
Once your surface is clean and dry, press the adhesive strip firmly onto the back of the hook and make sure there are no air bubbles trapped underneath.
Press the hook flat against the wall and hold it there with firm, steady pressure for at least thirty full seconds without letting go.
After applying the hook, wait a full hour before hanging anything on it so the adhesive has enough time to fully bond with the surface.
No-drill wall storage only works as well as the prep behind it, so taking these few extra minutes really does make a noticeable difference in hold strength.
Following these simple prep steps consistently means your command hooks will stay put longer and give you far fewer frustrating surprises down the road.
Safest Way To Remove Command Hooks
Removing command hooks the right way is just as important as applying them correctly, and taking your time with this step protects your walls every single time.
Knowing how to remove command hooks cleanly starts with locating the small stretchy tab at the bottom of the adhesive strip behind the hook.
Would you like to save this post?
Before you pull anything, remove the hook itself from the adhesive base so you are only working with the strip and the wall surface.
Stretch the tab straight down slowly and steadily along the wall rather than pulling it outward away from the surface at any angle.
Pulling the tab outward instead of downward is the most common mistake people make and the main reason paint peels off along with the strip.
Go slowly and keep the strip as flat and close to the wall as possible throughout the entire pulling process from start to finish.
If the strip breaks before it fully releases, use a piece of dental floss to gently saw through any remaining adhesive left between the strip and the wall.
Never yank, twist, or pry a command hook off the wall because doing so almost always causes paint damage that is frustrating and annoying to fix.
If any sticky residue is left on the wall after removal, a little rubbing alcohol on a soft cloth will clean it up without harming your paint.
Taking these careful steps every single time means your walls stay smooth, clean, and completely ready for whatever you decide to hang next.
15 Clever Ways To Use Command Hooks In Your Home
Now that you know how to apply and remove them correctly, it is time for the really fun and creative part of it all.
Command hooks are genuinely one of the most versatile and affordable tools you can use to get your home feeling more organized and tidy.
Here are 15 clever and practical ways to start using them in every single room of your home, starting right now.
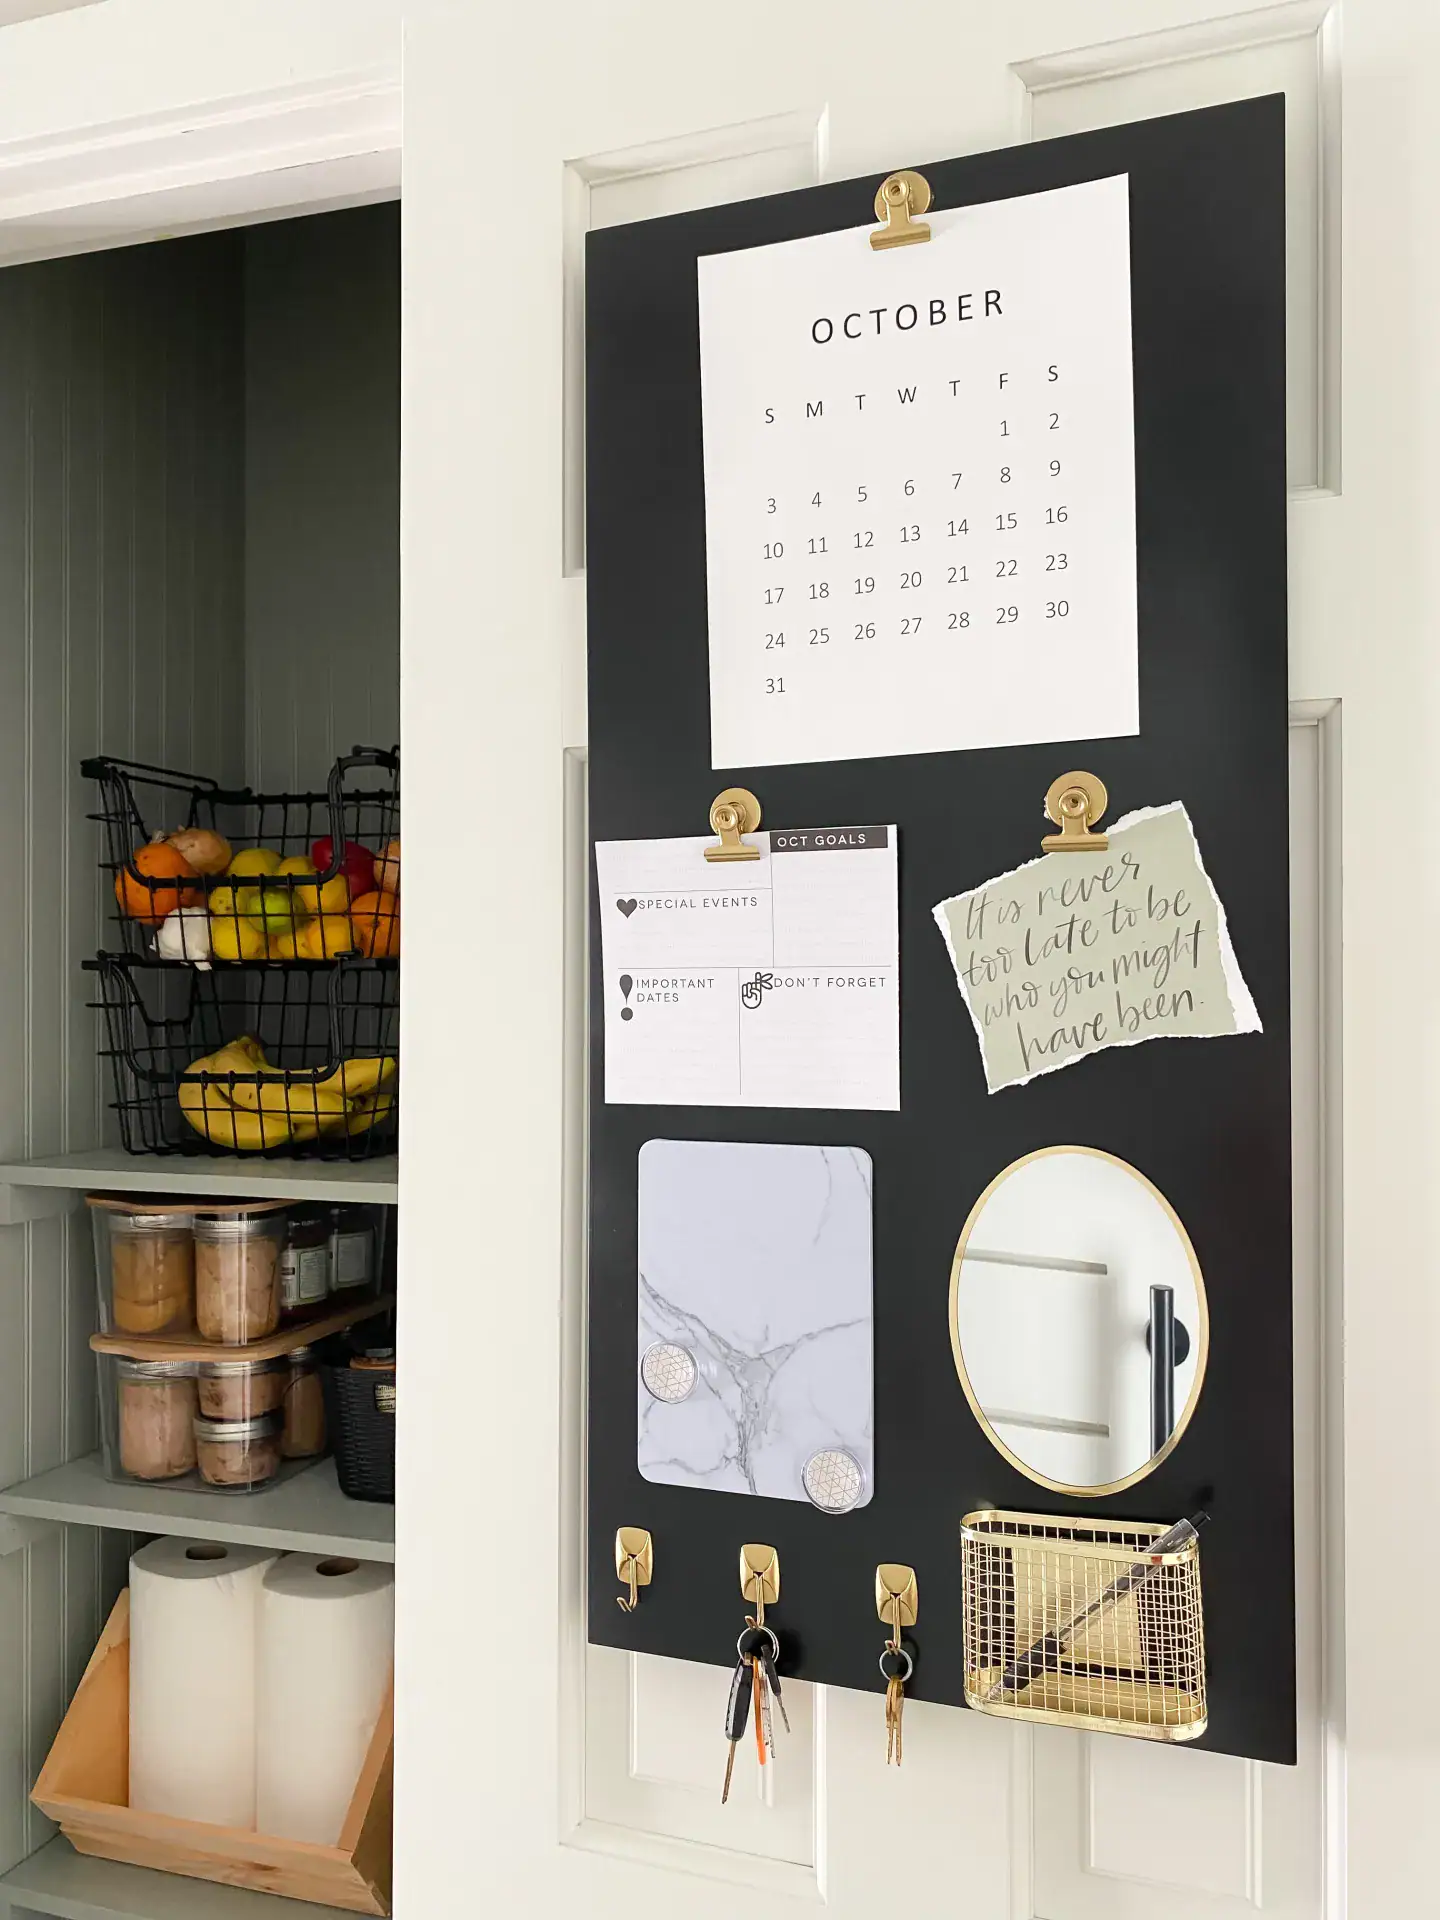
1. Hang Bags and Purses in Your Entryway
Setting up an entryway command hook organizer for your bags, purses, and everyday totes keeps them right off the floor and ready to grab.
2. Display Your Mug Collection
If you love your mug collection, coffee cup organizer ideas can inspire a fun and creative way to display them right on your wall.
3. Keep Kitchen Utensils Within Reach
Hanging spatulas, ladles, and measuring spoons on hooks near your stove is one of the brilliant kitchen organization hacks that keeps everything within arm’s reach and off your precious counter space entirely.
4. Create a Bathroom Towel Station
Hanging hand towels and washcloths on hooks in your bathroom keeps things tidy and within easy reach for everyone using the space each day.
5. Store Hair Tools Neatly
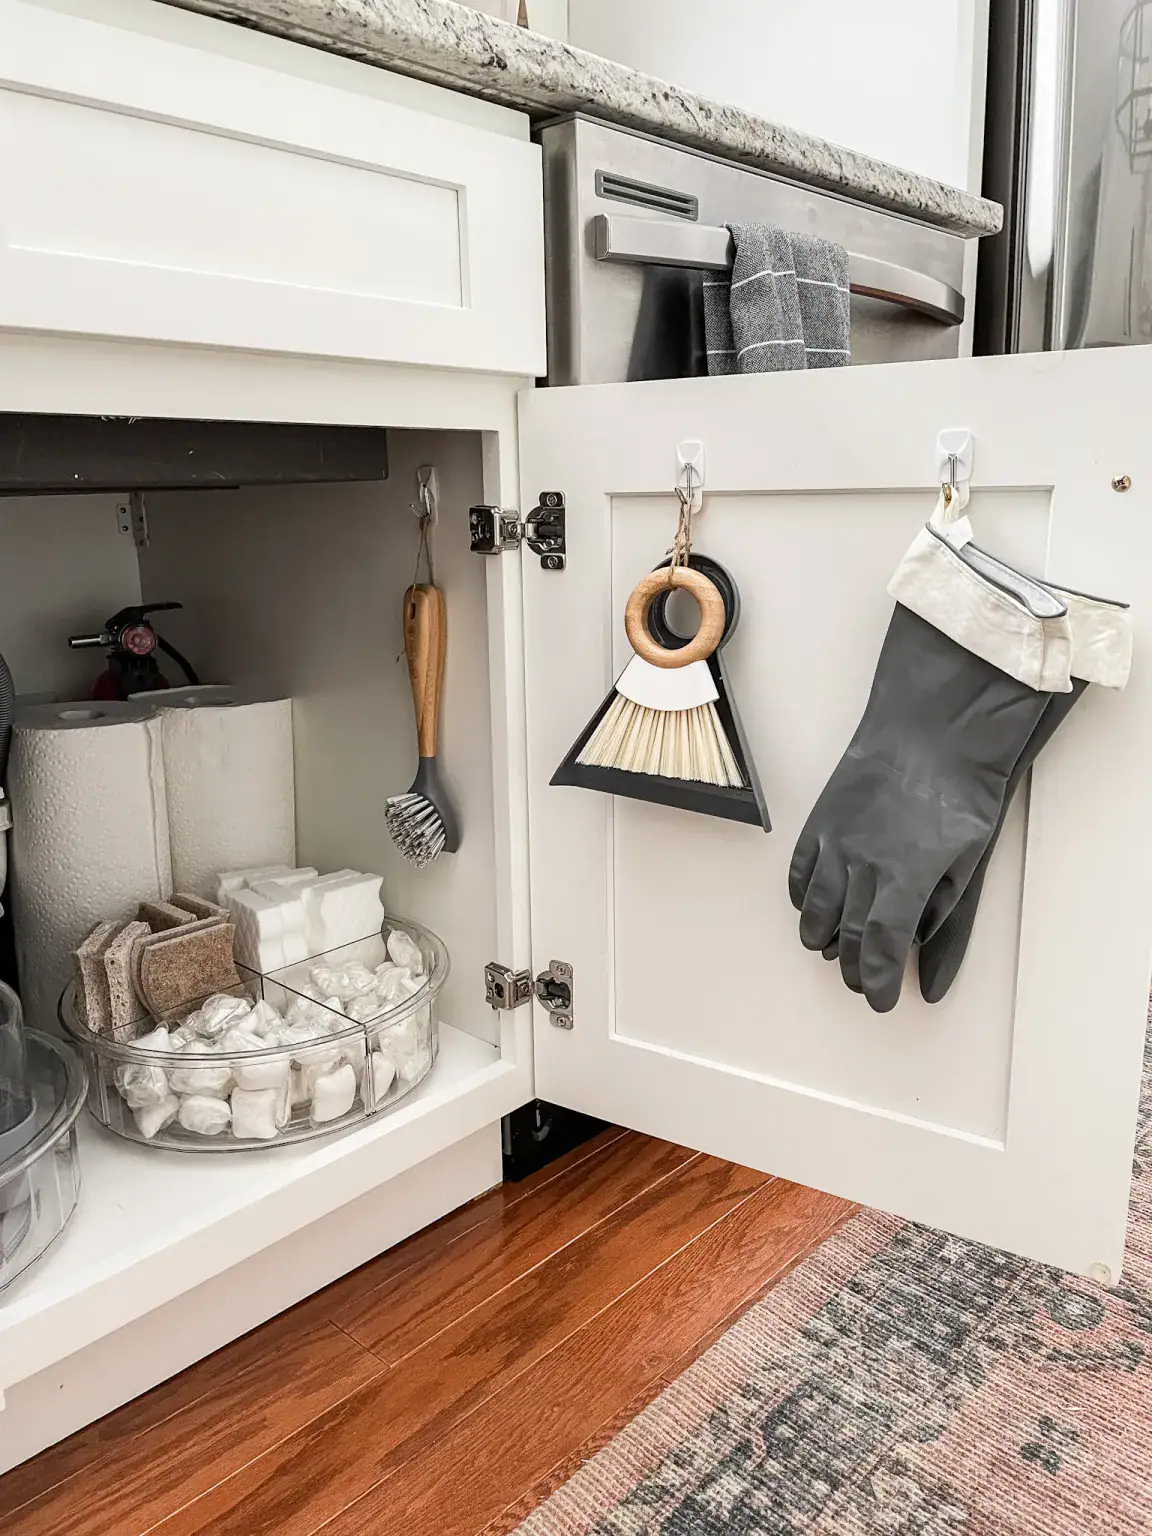
Sticking a hook inside your cabinet door to hang your blow dryer keeps your bathroom counter clear and your tools easy to find.
6. Try a Gallery Wall Without Nails
Learning how to organize a gallery wall using adhesive strips makes the whole process feel so much less intimidating and completely stress-free.

7. Add Laundry Room Storage
Hooking items on your laundry room walls and combining that with laundry room organization ideas gives you a smarter and more functional space overall.
8. Organize Your Garage
Hanging tools and cords on hooks is one of the best garage organization tips, efficiently and affordably.
9. Create a Tidy Charging Station
A hook mounted on the side of your nightstand or desk creates a simple and tidy spot for keeping charging cords contained and neat.

10. Hang Kids’ Backpacks and Jackets
A row of hooks at kid height near the door keeps backpacks, jackets, and hats organized and right where little ones can reach them.
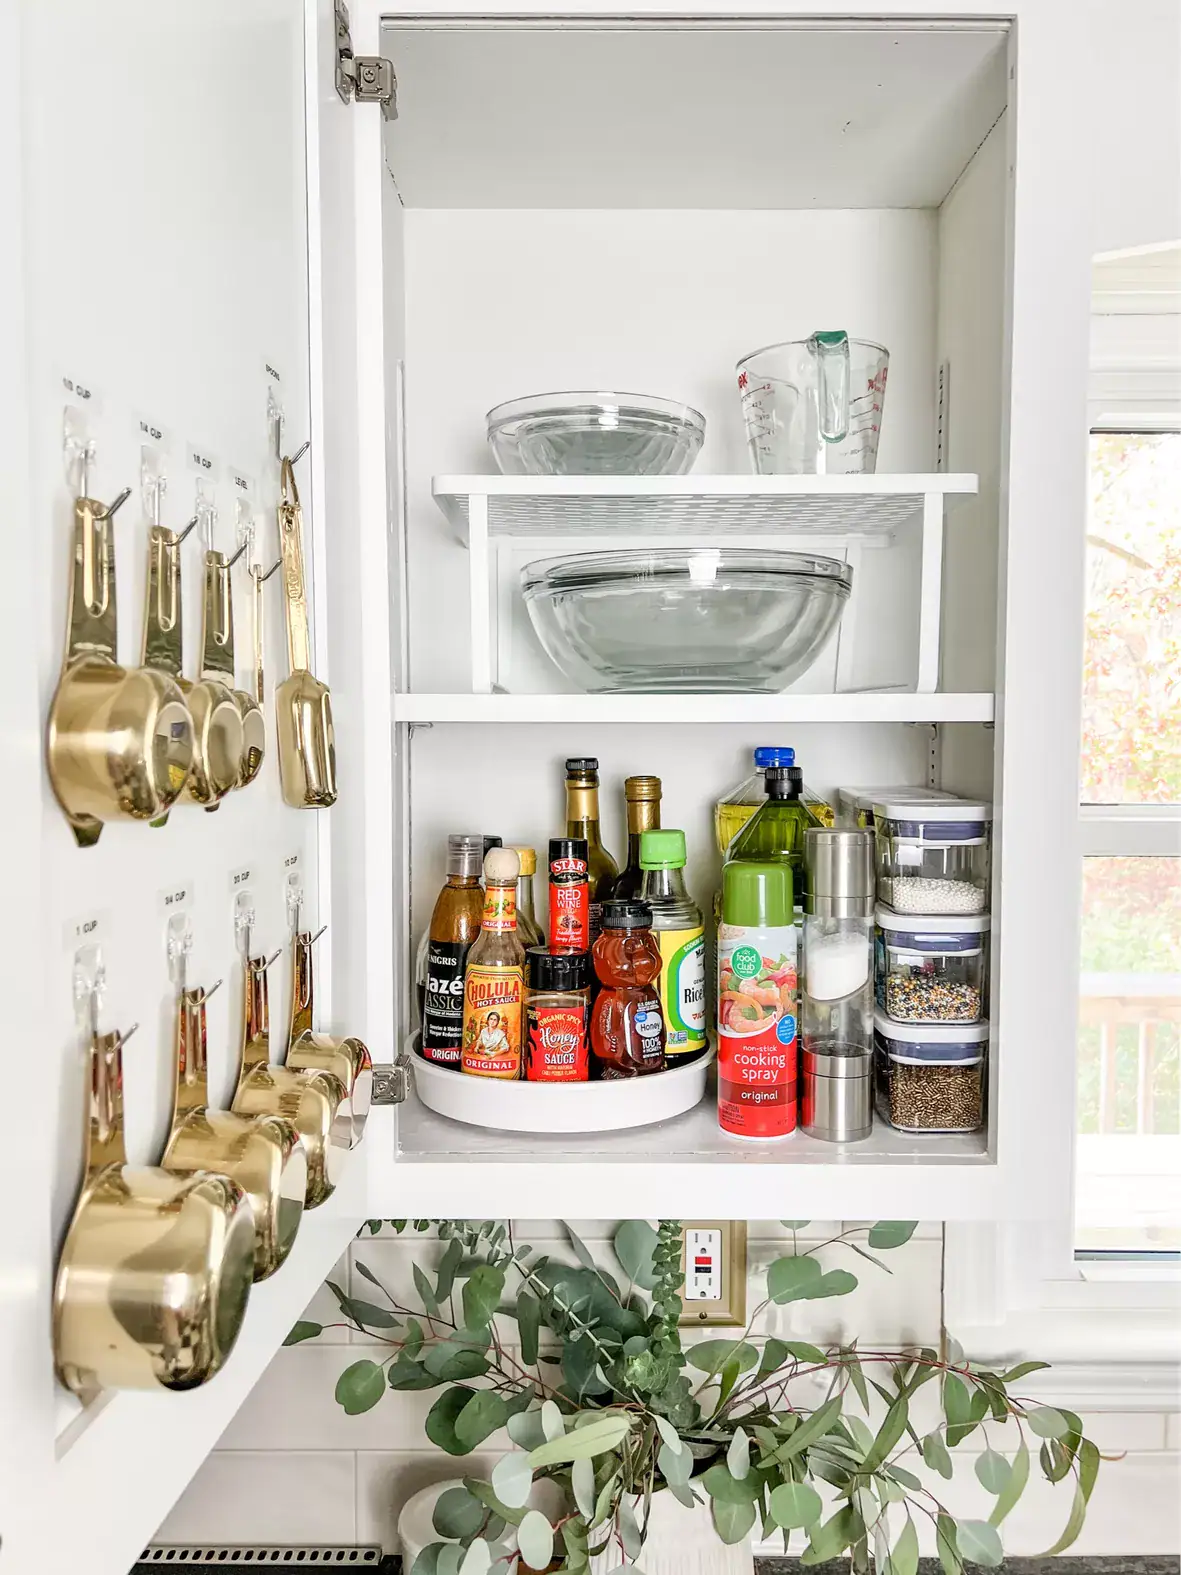
11. Make Cabinet Doors Work Harder
Knowing how to organize a kitchen cabinet helps you figure out exactly where command hooks will make the most difference inside your cabinets. Hooks on cabinet doors also work beautifully with kitchen cabinet organizers to help you get more storage out of the space you already have.
12. Set Up a Better Home Office
Adding hooks for cords, headphones, and small supplies is one of the smartest first steps when organizing a home office from the very beginning.
13. Maximize a Small Bathroom
A few hooks help your bathroom organizers for small spaces the extra storage it needs without taking up precious floor space.
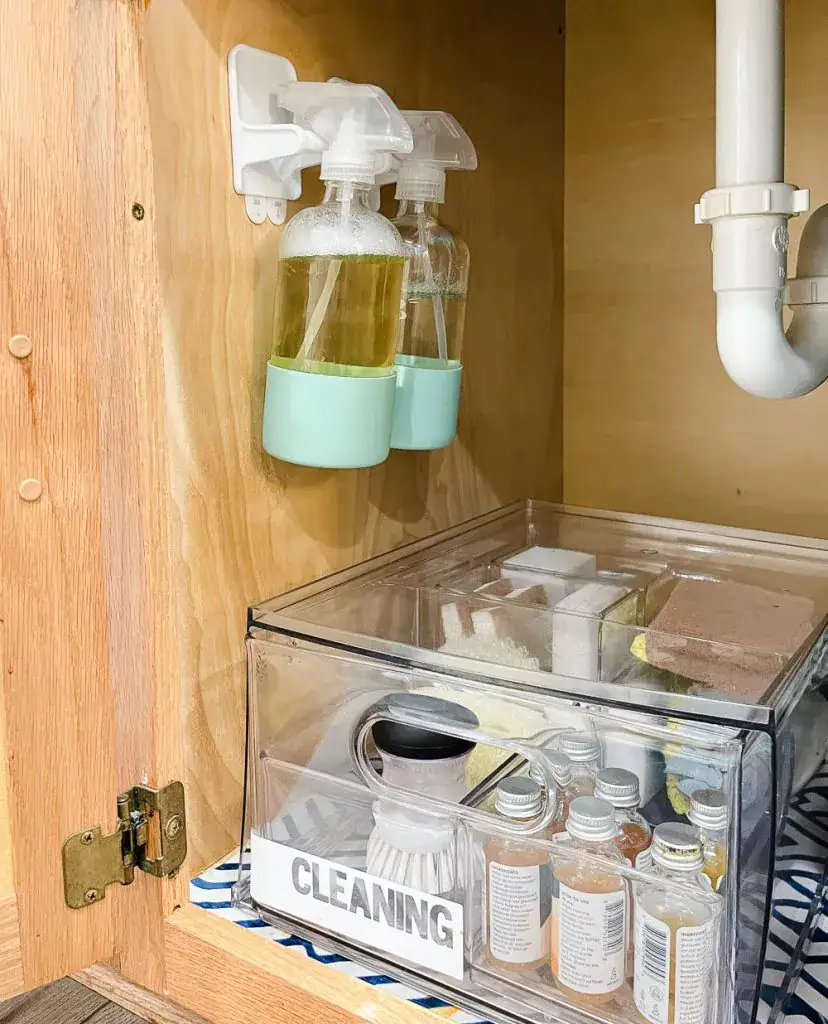
14. Organize a Pantry or Storage Closet
Hanging hooks inside a pantry or storage closet for bags, aprons, and small tools keeps everything tidy and right where you need it. Pairing those hooks with some kitchen cabinet organizers gives you a complete and well-thought-out system for your pantry storage.
15. Hang Seasonal Decorations Without Damage
Command strip organization makes swapping out seasonal wreaths, garlands, and lightweight signs so simple without ever leaving a single mark on your walls.

Frequently Asked Questions
Why do my command hooks keep falling off the wall?
Your Command hooks usually fall because the adhesive never fully “bonds” to the wall or the bond gets weakened over time. The most common causes are dust/grease on the paint, cleaning the wall with household cleaners, hanging before the strip has set, or putting them on paint that hasn’t fully cured.
How should I pick which command hook to use?
Match command hooks to your surface and the load, including pull from bags or towels. Choose a rated hook above that weight, pick water resistant strips for bathrooms, and use picture hanging strips for frames.
How do I hang a heavy item with command hooks?
For heavy items, use picture hanging strips or a drywall hanger rated for the weight, not a single hook. Press strips firmly, wait one hour, then hang and test gently and slowly before letting go.
When should I not use command hooks?
Avoid command hooks on fresh paint, loose paint, brick, plaster, or delicate wallpaper, since removal can tear the surface. Skip heat spots, steamy showers without water resistant strips, and any item that could injure someone.
How to remove command hooks cleanly if the pull tab breaks?
If the pull tab snaps, slide dental floss behind the base and saw down to separate the plastic from the strip. Warm the remaining adhesive with a hair dryer, then stretch it straight down slowly.
There is no easier or more affordable way to get started with home organization than picking up a pack of command hooks.
Walk through your space today and look for spots where a simple hook could make your daily routine feel so much easier and more manageable.
Trying even just one or two of these ideas will show you how much of a difference such a simple tool can make.
So, grab those hooks and enjoy watching your home transform into something more organized, one small step at a time.


So many amazing ideas I’d never even thought of! We’re turning our old airing cupboard into an actual cupboard, and love the idea of using the hooks on the back of the door.
Sarah | https://www.dreamofhome.co.uk