This post is sponsored by Michaels Stores, but all opinions are my own.
When I think of spring, I immediately think of updating my front porch with a new wreath. It is the easiest way to breathe new life into the outside of your home and welcome the new season. Generally, I go for wreaths full of faux blooms, but this year I’ve been gravitating to a more organic look like moss.
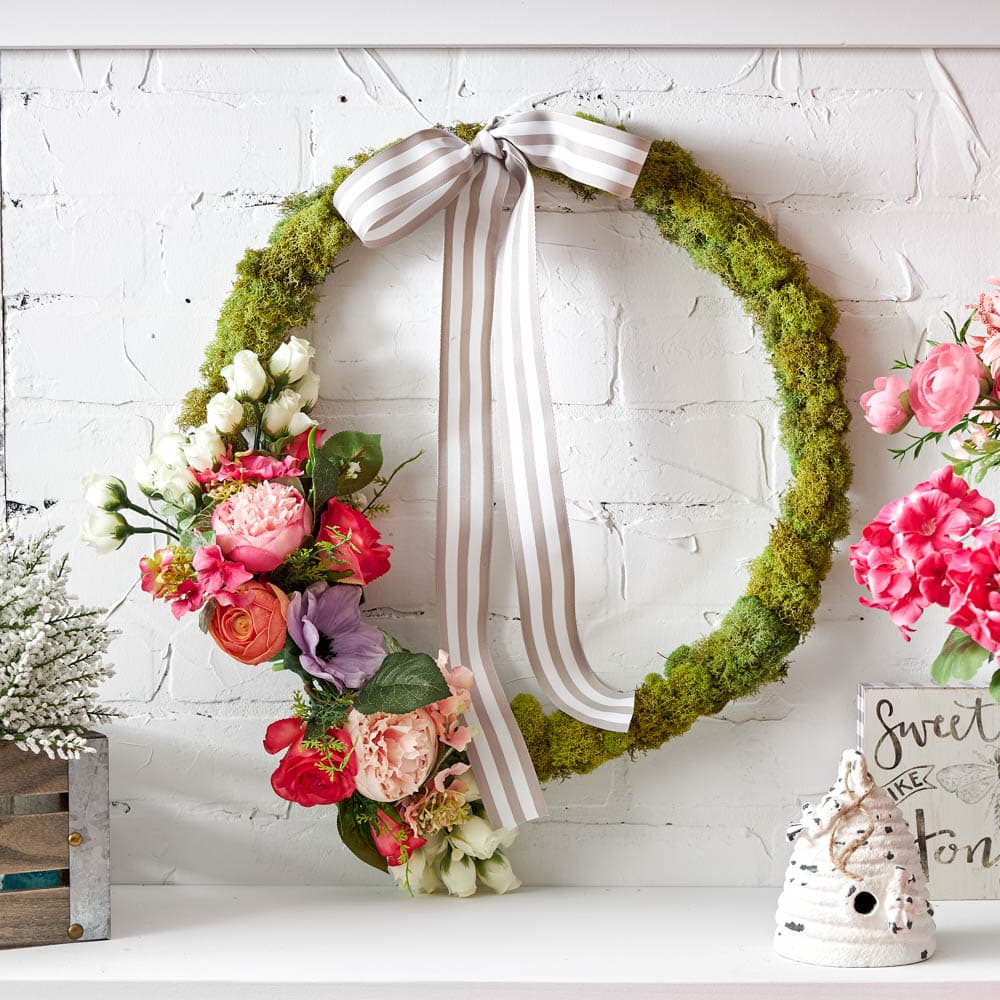
Moss wreaths are nothing new, but the way I’ve made this one is fun, vibrant, and easy to change out each season making it well worth the effort to make.
There is nowhere else I go for faux florals than Michaels. They have THE widest selection of hues and types of flowers and greenery I have ever seen. I absolutely live for their sale on them, and then it looks like a flower market has exploded in my car when I head home!
One of the newest features I learned of Michaels is their same-day delivery service. The worst is when you get started on a project just to find out you are missing something or don’t have enough of something else. You can simply order it online and have it delivered right to you for a nominal fee. So brilliant!
Michaels launched their spring decor guide that is full of so much amazing inspiration for crafting and your home, which I am so honored to be a part of it this season. If you are trying to decide on how to decorate for spring, then you will want to check it out!
This post may contain affiliate links. As an Amazon Associate and a participant in other affiliate programs, I earn a commission on qualifying purchases at no additional cost to you.

When I created this, I envisioned it either being hung on a front door or even above a fireplace. It is so versatile.

You can also make this using a chunkier wreath form if you want it a little more substantial looking. I think either way it is gorgeous and very unique looking.
So let’s get right to it.
How To Make A Moss Wreath For Spring:
Materials Needed:
- Floral stems & picks
- Floral wire
- Floral tape
- Floral cutters
- Glue gun
- Hot glue
- Wood wreath ring
- Moss – I used 2-3 packs
- Ribbon

Instructions:
Step 1: Cut Floral Stems
Would you like to save this post?
Using floral cutters, cut stems of flowers to approximately 3”-6” stems to vary placement.
TIP – The rule of thumb is to select larger flowers first and then smaller flowers and fillers, like berries to make it full-looking.
Step 2: Attach Floral Stems
Attach stems and arrange flowers on the bottom left corner of the wreath ring. Attach larger blooms first.
Using the floral wire, wrap the wire around the stem and wreath ring tightly. Use floral tape to cover the wire and secure the stem to the wreath. Once large blooms are attached start adding in smaller flowers and/or berries and greenery.
Step 3: Attach Moss
Using the glue gun, glue moss to cover the rest of the exposed wreath ring that is not covered in flowers. Wrap moss on the sides and glue in place to make sure all the wood ring is hidden and no edges are exposed.
Step 4: Attach Ribbon
Secure ribbon to the top of the wreath by looping it around the top of the ring and tie the ends in a knot or in a bow.

Ta-da! Quickest and easiest wreath to make ever. I think this took me less than 30 minutes.

It is time to start decorating for spring and this tutorial is the perfect place to start!
You can check out the other tutorials I have created with Michaels this season and get even more spring inspiration for your home! And make sure to pop over and look over the new Spring Decor Guide!
THIS IS A SPONSORED POST. A BLISSFUL NEST HAS RECEIVED PAYMENT, TRADE, AND/OR PRODUCTS FROM MICHAELS IN EXCHANGE FOR PROMOTING. HOWEVER, ALL OPINIONS STATED ARE OUR OWN.


