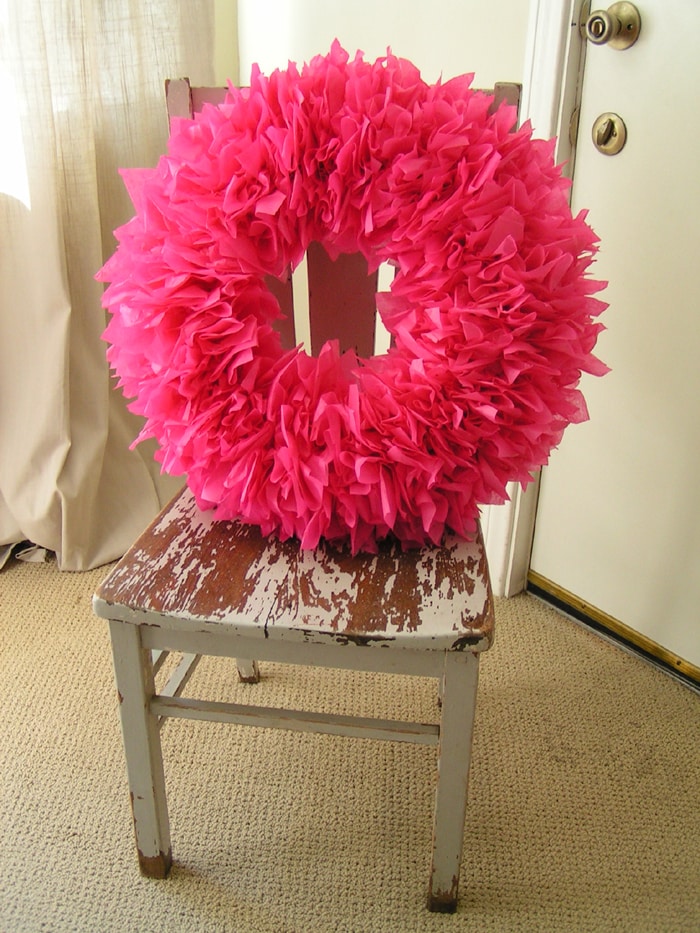
This tissue paper wreath was my labor of love from last week’s party. Now that I think of it, I should have done it at the table rather than sitting on the floor of my Family Room, but I really wanted to watch TV with my husband too. I guess my bad back and some IB Profin are what I get for trying to accomplish 2 tasks at once. So if you sit at a table I am sure you will not get “my” bad back!

This post contains some affiliate links
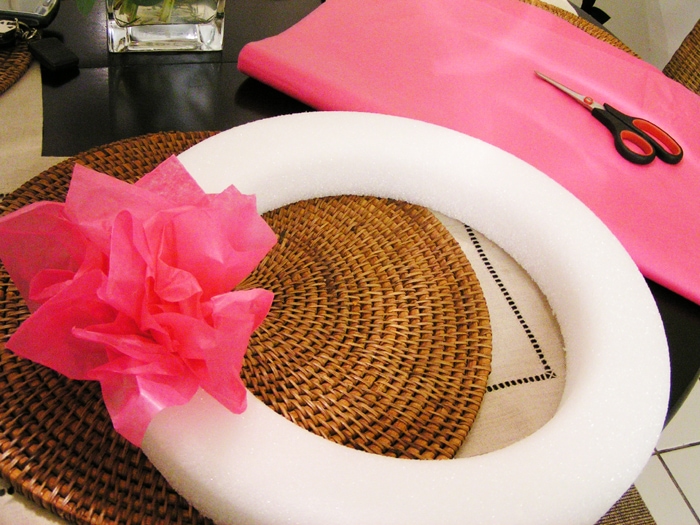
Materials Needed:
- round styrofoam
- glue gun
- tissue paper– cut rectangles of 5X7
- letter opener (or something pointy – could use a knife!)
Directions:
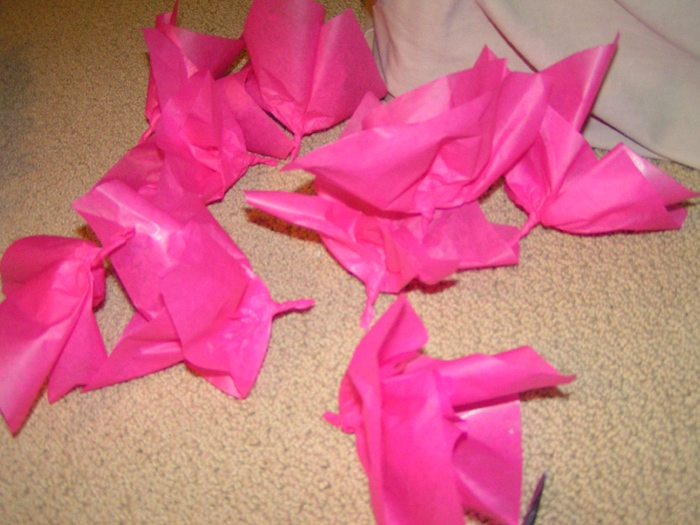
Step 1 – Take one of your 5X7 rectangles of tissue and gather it so you have a point at the bottom (as seen below). Then twist the point. Do this to all your squares.
Step 2 – Take your letter opener (or pointed object) and make a small round hole in the Styrofoam- about 1/2″ diameter.
Step 3 – Fill the hole with glue and put pointed end of tissue paper into glue filled hole. You may need to use your letter opener to get the point completely in. And that’s it!
TIPS – Just make lots of holes close to each other so the tissue will look full and close together. I put tissue on the outer sides of the foam but not on the interior as you could not see the interior after how full I had made the rest.
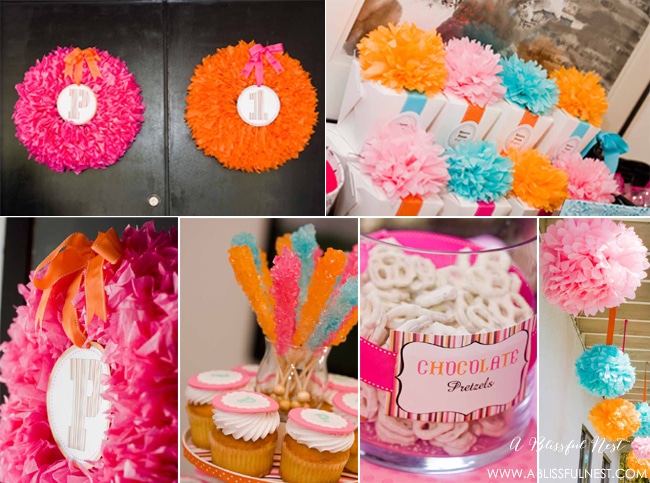
I have not attached my round circles with Parker’s “P” and “1” but I am going to make a big bow, hole punch a hole in my circle and thread by bow through and then hot glue to wreath. I swear hot glue is one of my best friends!! Have fun ladies!!
You could even spray your tissue with glitter spray for a light luster if you were having a fairy party!
Want to see the full party these were used in?? Check out Parker’s 1st Birthday Party right here.





I cannot wait to get started on this wreath! I’ve been looking for something to do over the winter and this is a great project! I’m going to do some Easter/Spring themed wreaths and also buy some foam balls in various sizes to create somewhat of a topiary from them. I’m also going to purchase some patterned tissue paper n coordinating colors and add them to the solid colored paper! So may ideas and so inspiring! Thank you for this great project! – c.
We are planning to make the wreath for a Bridal Tea a couple of us are hosting. The wedding couple have chosen a lime green and hot pink for their wedding colors. We are making a hot pink and putting their last name initial in the center. I know you posted earlier it was a large Styrofoam, may I ask where you purchased the wreath? One the girls look at them, she thought this one might be too small, it was 12 inches. Thanks for sharing.
Rebecca
I loved your paper tissue wreath so much..that I had to make a valentine theme one for my house..i am not sure how to post picture on here but i love it
i just love your tutorial. can’t wait to add this to my project list to tackle. curious- do you hang inside? i am wondering what you can spray on it so that it could be hung in outdoor temps/weather? ideas?
i always thought that the glue gun would melt the foam tree or wreath
just found your blog via pinterest and that wondeful tissue paper wreath! happy to be here.
I think you did a fantastic job! Beautiful color….
This is a very cute idea!!
I am not a crafter by any means but I couldn’t resist trying to make this gorgeous tissue paper wreath. I’m happy to say that I just completed it and it looks great, just in time for Mother’s Day. Thank you so much for sharing, I can’t wait to create more!
Sara- That is fantastic!! You can go on our FB page and share it. I would love to see it. Happy Mother’s Day!
This is so bright and colorful and cheerful…I am definitely going to try it 🙂
Hey- Can I see what it looks like after you put the bow in? Also what are the inserts? I am new to all this but am getting into it fast! I love your blog you have GREAT ideas!
Thanks,
Amanda
Hi Amanda!
Here is the post so you can see what they look like finished.
https://ablissfulnest.com//2010/05/parkers-1st-birthday-party-pictures-are.html
It is made using a Styrofoam circle. Let me know if you have any other questions.
=)
Rebekah