Creating orange clove pomanders sounds easy at first, but the process can feel messy or confusing if you’ve never tried it before.
You want them to smell good and look nice, but sometimes the cloves fall out or the orange starts to mold too fast.
Some tutorials for how to make orange pomanders get too fancy or use tools you don’t have lying around at home.
If you’re short on time, it’s frustrating when a simple project becomes a big one that clutters your table for hours.
You might wonder how many cloves to use or how to make them last longer than a few days.
Kids can lose interest quickly if it gets too complicated, and you don’t want a sticky mess left behind.
On top of that, it’s hard to know how to display them so they fit with the rest of your fall decorations.
Some orange pomander designs look great online but are hard to recreate without breaking the skin or making uneven lines.
When you’re already prepping for things like a fall charcuterie board or planning a gathering, you want crafts that feel fun and low-stress.
So, let me share a basic tutorial with you that you can even do with the kids while sipping cider and playing your favorite fall playlist in the background.
This post may contain affiliate links. As an Amazon Associate and a participant in other affiliate programs, I earn a commission on qualifying purchases at no additional cost to you.
How to Make Orange Clove Pomanders:
So here are the basics of what you will need.
Materials:
Oranges
Cloves
Nail
Yep, that’s it, folks. That is all you need and I bet you have all this already at home!
Directions:
Step 1: Pick a pattern
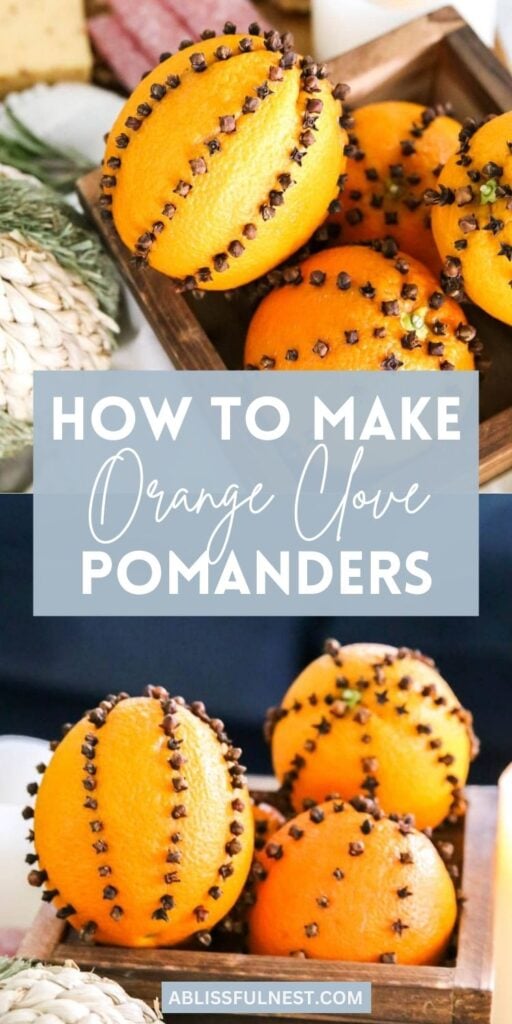
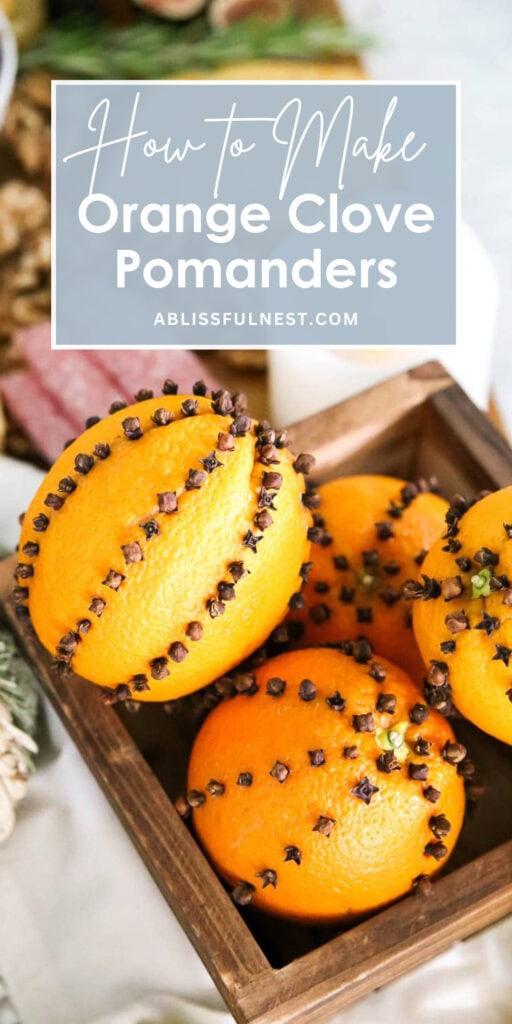
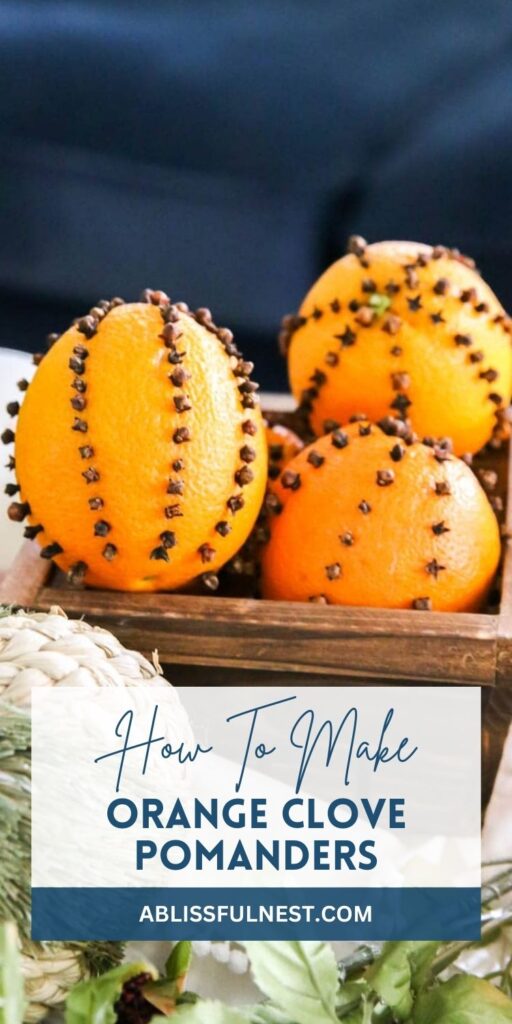
Decide what pattern you would like. I did stripes from the top to the bottom.
You can use a pencil and draw them in or freehand it which is what I did.
Step 2: Poke a hole to start your design
Using your nail poke a hole at the top of your line (or at the beginning of your design) to start your pattern.
Would you like to save this post?
We'll email this post to you, so you can come back to it later!
Step 3: Poke clove into holes.
The cloves have a long stem on them so it is easy to poke them into the holes from the nail.
I tend to make a couple of the nail holes at one time so then I am putting the cloves in at the same time. Just saves on the back and forth of it.
Have a paper towel handy because there will be juice from the orange that will spill out and it can get sticky.
And that’s it my friends. I told you it is the easiest DIY ever.
Patterns you can do with your cloves.
This time around I just did the stripes but you could do clusters so they look like polka dots or little flowers or even swirls. The ideas are endless.
I have a recipe you can follow and then you would just add these orange clove pomanders to it as well.
How long do pomander balls last?
I would say my orange clove pomanders lasted up to a week and a half.
I left them out for their delicious smell in our living room in the basket and they were very fragrant for almost two weeks.
You can dry them as well by placing them on a baking sheet and putting them in the oven around 180° for about 4 hours.
I would love to try something like this with other citrus fruit like lemons. I bet that would smell SO delicious.
Have you made pomanders before??
I just love this orange and clove tradition to do with your family each year.
Frequently Asked Questions
How do you make orange clove pomanders that last longer?
Choose firm, fresh oranges that don’t have any soft spots, bruises, or damage to the skin so they dry evenly and last longer. Space the cloves apart so the orange can breathe and slowly dry out without trapping moisture.
Do orange pomanders need to be refrigerated?
No, they should stay out at room temperature in a place with good airflow so they dry naturally. Putting them in the fridge traps moisture and can cause the oranges to get moldy or soft too fast.
What patterns work best for decorating orange pomanders?
Simple designs like stripes, swirls, or dotted bands are easier to create and look nice without too much effort. You can also use a toothpick or skewer to lightly draw a shape like a star or heart before adding the cloves.
Can kids help with making orange pomanders?
Yes, this is a great fall project for kids, especially if you pre-poke the holes to make it easier for them to push in the cloves. It’s a fun way to spend time together, and the scent makes your home feel festive and warm.
How do I stop my pomanders from going moldy?
Start with healthy oranges and make sure there’s space between each pomander so air can move around while they dry. You can also roll them in a mix of cinnamon, nutmeg, and ground cloves to help absorb extra moisture and add even more scent.
Follow along to get more of my tips on home decor, DIY, and lifestyle on the following:
Grandmother had one hanging by her card table for years. It smelled great as we played cards. I lost most of the games, but have fond memories of those years.
Yes, I have made pomanders for many years. I covered the entire orange with cloves and let them dry. The orange will shrink a little bit and they will last for years. Love making them, but covering the entire orange gets a bit messy but worth the effort.


Yes, I have made them for many years, I start before Thanksgiving and let them dry. They still have a wonder aroma and are great for gift giving.
Beautiful idea…I was thinking of doing an apple pomander but orange sounds wonderful as well. This is a lovely blog. I will share it with my friends.
Grandmother had one hanging by her card table for years. It smelled great as we played cards. I lost most of the games, but have fond memories of those years.
Yes, I have made pomanders for many years. I covered the entire orange with cloves and let them dry. The orange will shrink a little bit and they will last for years. Love making them, but covering the entire orange gets a bit messy but worth the effort.
Those sound like they smell amazing!