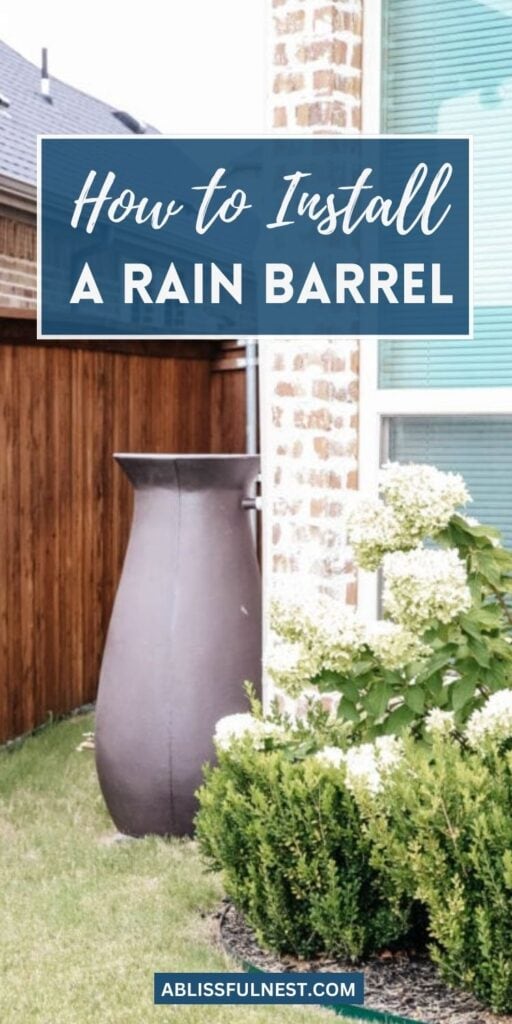
If your water bill keeps rising every summer, learning to install a rain barrel is one smart move you can make.
Your garden dries out fast in summer, and dragging hoses around every single day wastes both your time and money.
Watching your plants wilt even after watering them is frustrating, and it means your current setup just is not working.
Rainwater harvesting is a simple solution that cuts water costs and keeps your garden healthy through even the driest months.
You do not need special skills or tools to get started, and the whole project takes just a few short hours to complete.
Stormwater runoff reduction is a big added benefit, since collecting rain stops extra water from washing away your garden soil.
This guide covers every step clearly, so you will feel ready and confident before you even touch your first tool.
This post may contain affiliate links. As an Amazon Associate and a participant in other affiliate programs, I earn a commission on qualifying purchases at no additional cost to you.
With the right approach, you can set up an eco-friendly irrigation system that works beautifully without stress or second-guessing every decision.
So, I’m here to walk you through every single step so you feel confident about creating your own sustainable gardening water source.
Use my tips to help you understand where to place your barrel, how to connect everything safely, and how to enjoy water conservation.
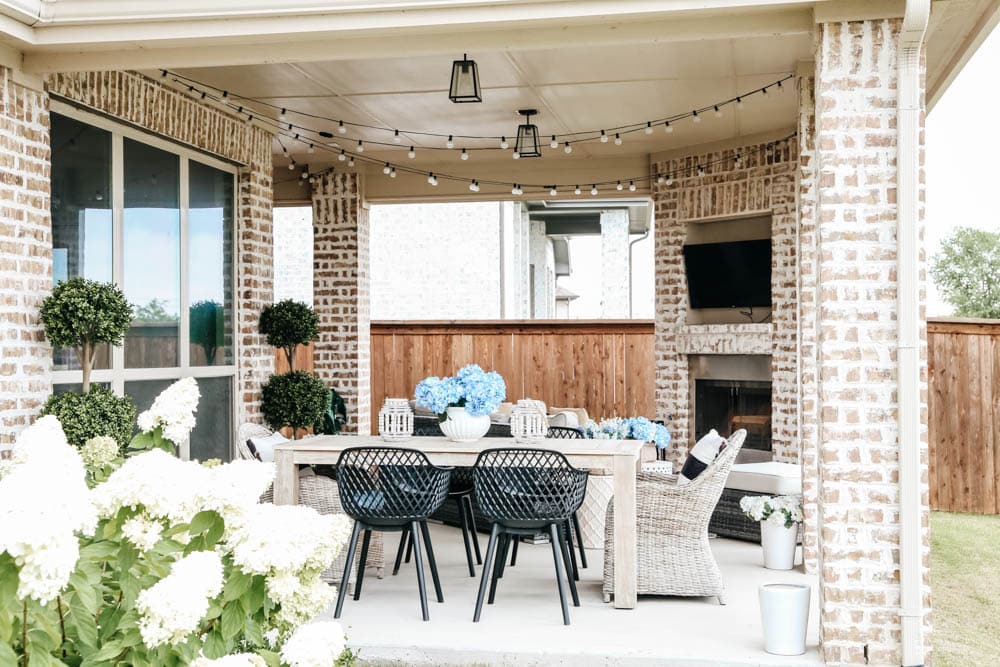
Why You Should Install a Rain Barrel System
But one of the biggest questions my husband asked me was why should we install rain barrels.
Really I got onto the idea for needing rain barrels when I was complaining to my neighbor about how much our water bill was each month and how if I did not water out yard as much as I do, I was going to lose my landscaping that we so tirelessly installed the year before.
To be really blunt, our water bill during the hot months pushes close to $500. It’s insane.
What I love about rain barrels is that they capture water from your roof and collect it into a barrel for later use, which reduces the amount of city water used to upkeep your yard.
How To Install A Rain Barrel Step-By-Step Guide
Setting up rain barrels is easier than you think.
We researched and went through so many websites and tutorials all to boil down to the kind of downspout you get is EVERYTHING. More on that soon.
First here are all the materials you need to start.
Materials Needed to Install Rain Barrels:
- Rain Barrels
- Diverter
- Pavers (we used 24×24)
- Sand
- Shovel
- Saw
- Measuring Tape
- Level
- Pen
- Piece of Cardboard

Steps for Installing Rain Barrels
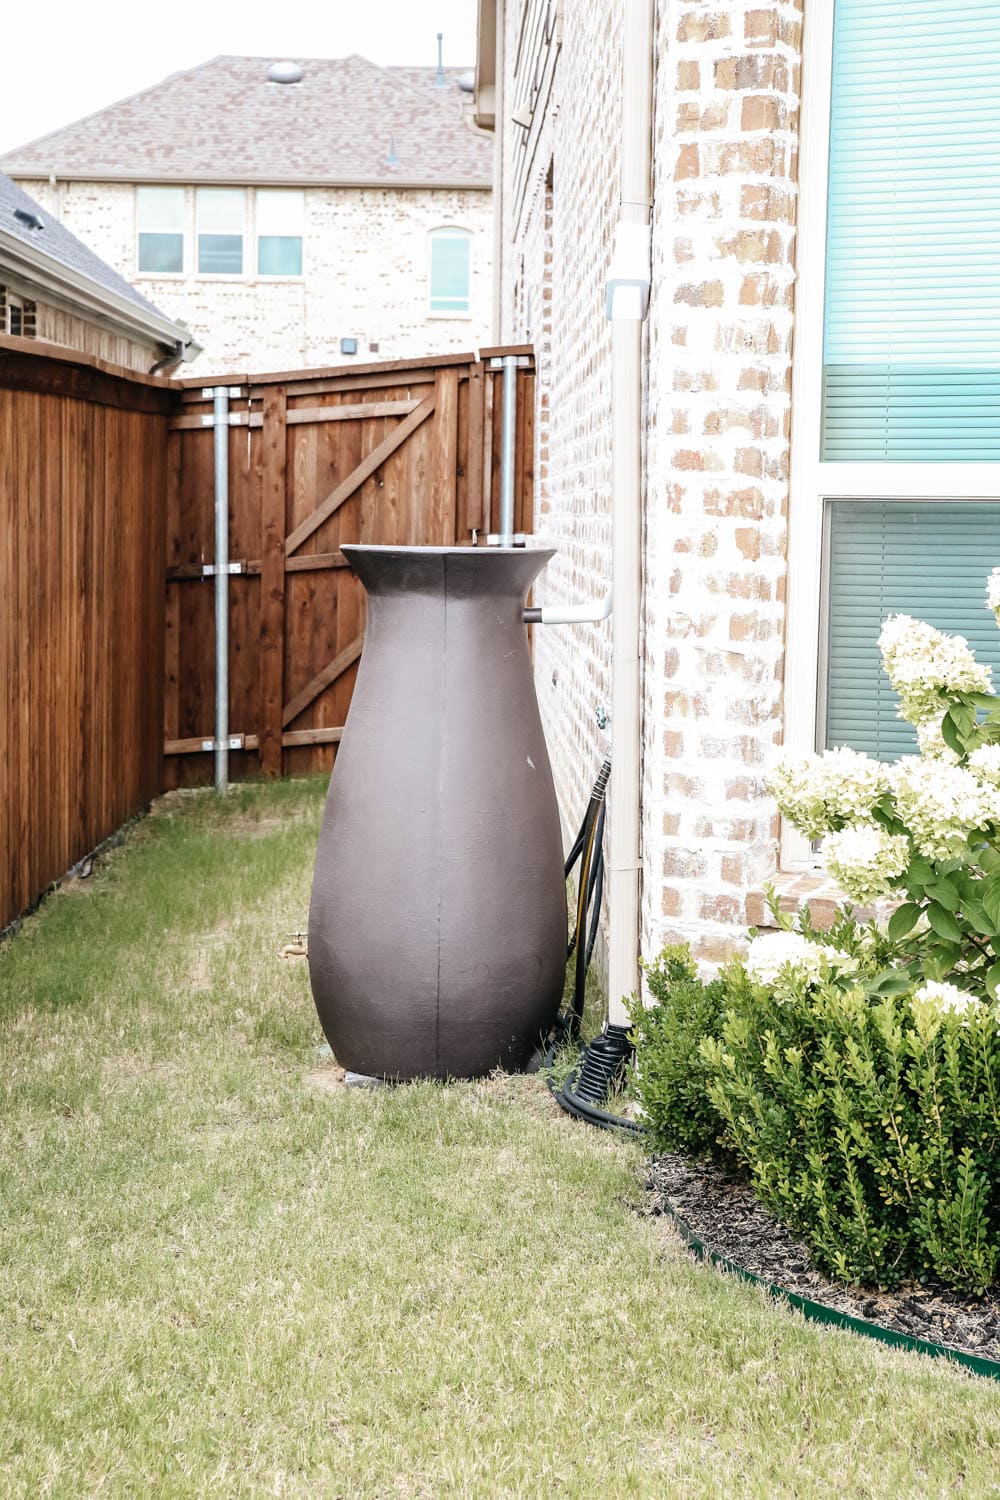
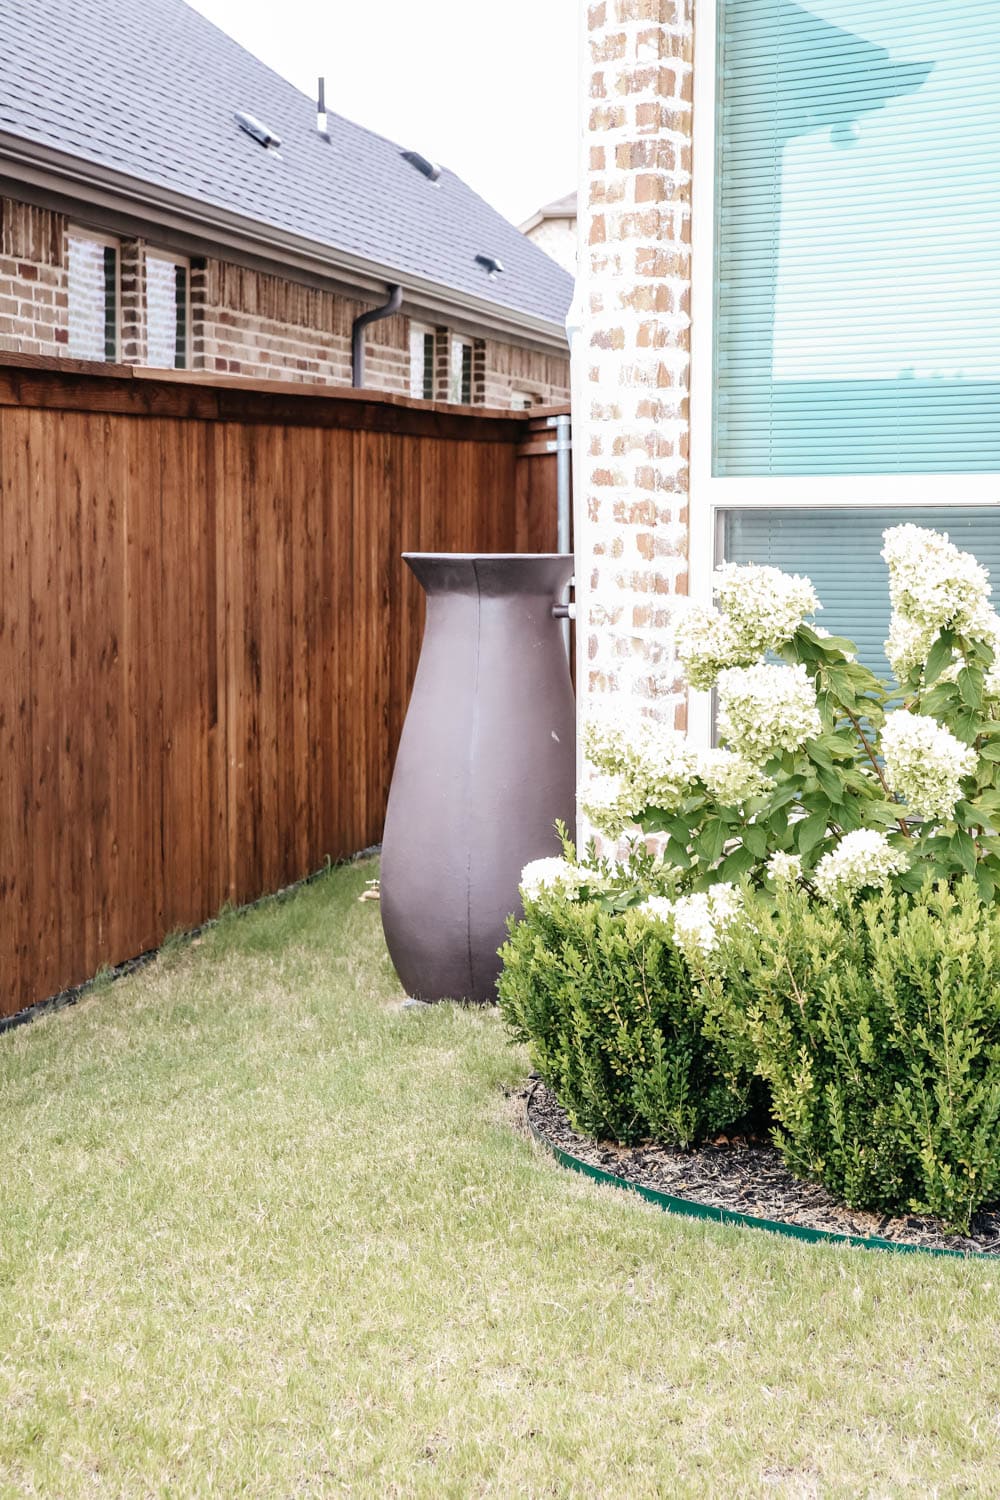
Step 1: First, start with figuring out where to place your rain barrels.
If you are installing more than one rain barrel, decide if you would like to attach them to each other or spread them out around the perimeter of your house.
We decided to have one towards the front of our home and one on the backside.
They both have different levels of our roof that drain into each to spread out the water disbursement between the two.

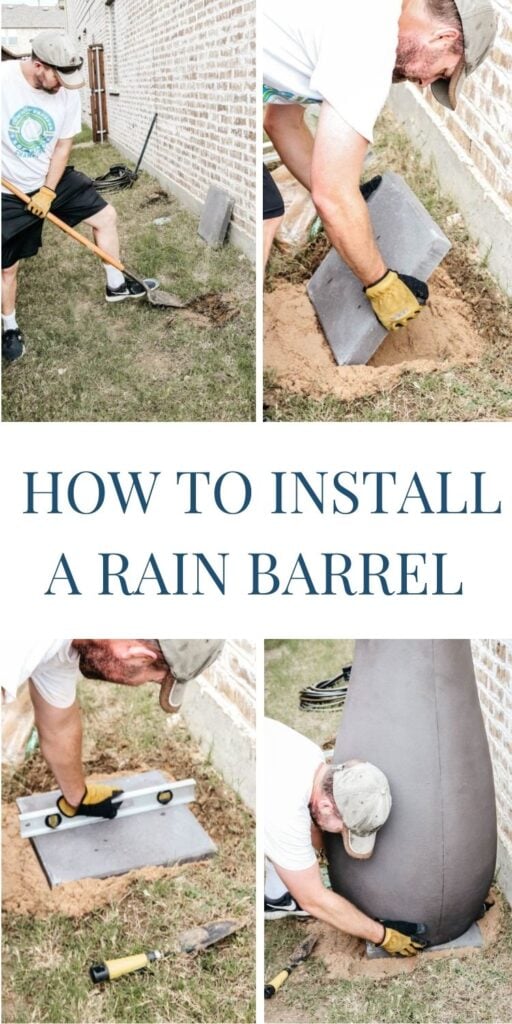
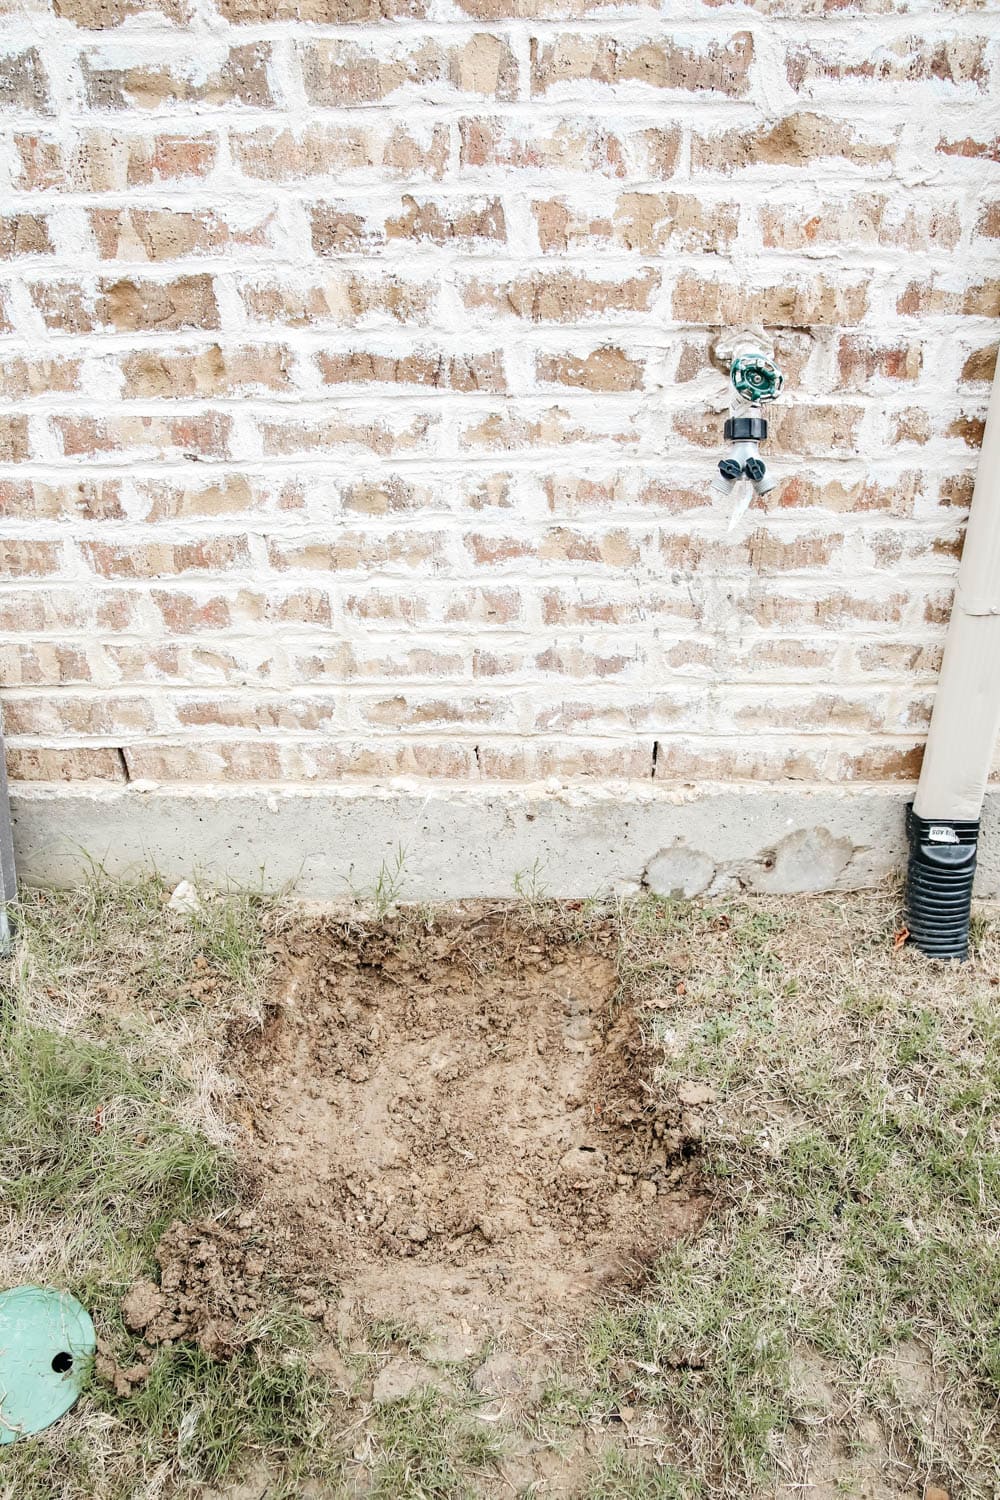
Step 2: Remove grass and dirt for paver.
Dig out a space slightly bigger than your paver (depending on the size you get- we used a 24×24) to create a flat space for your paver to sit on top of.
It doesn’t need to be perfectly level at this point but flat enough so your paver is not sloped.

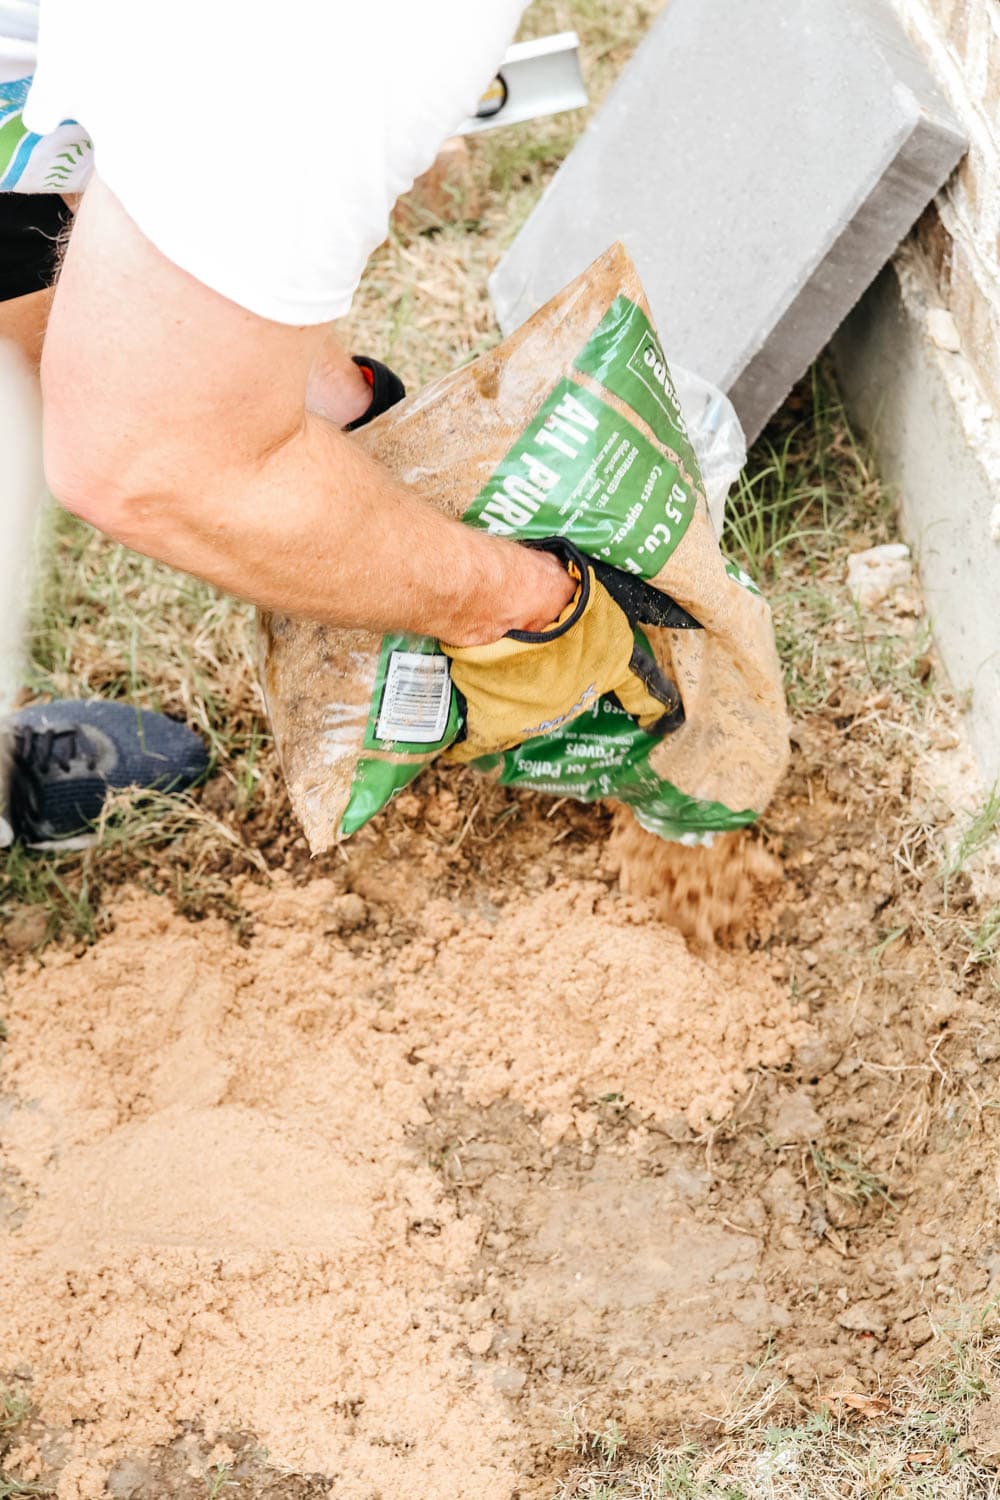
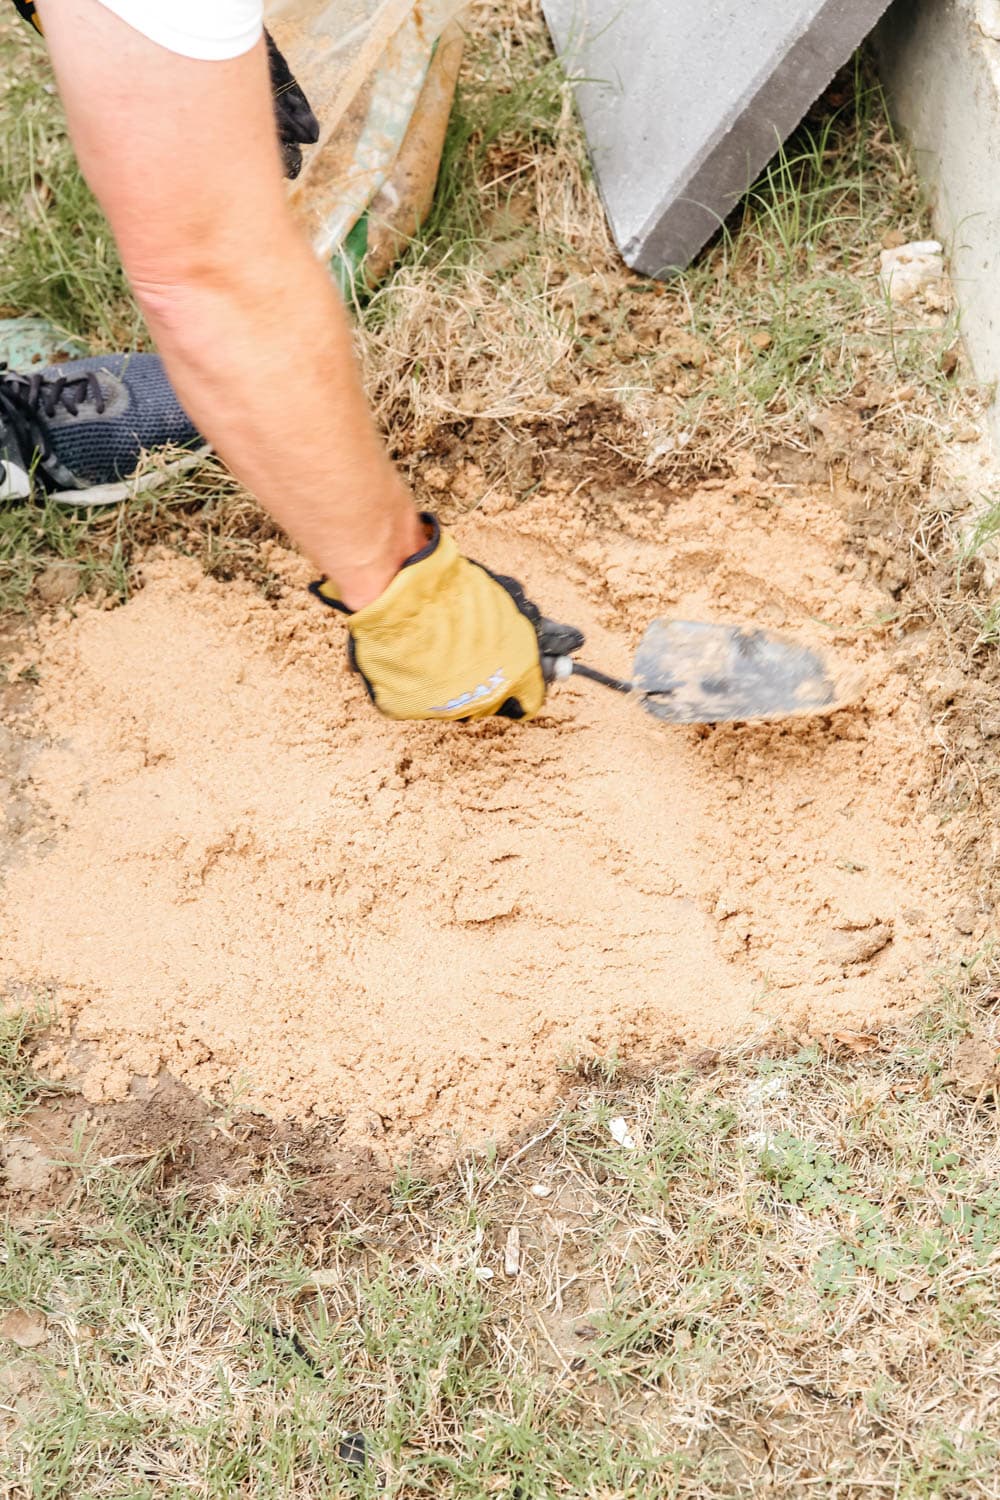
Step 3: Lay the sand
Lay sand on top of the area you just dug out. Use 1-2 inches of sand and create a nice smooth layer.
The sand is what is going to help the paver lay nice and flat.
Smooth out the sand so it is flat and use a level to check to make sure it is fairly level at this point.
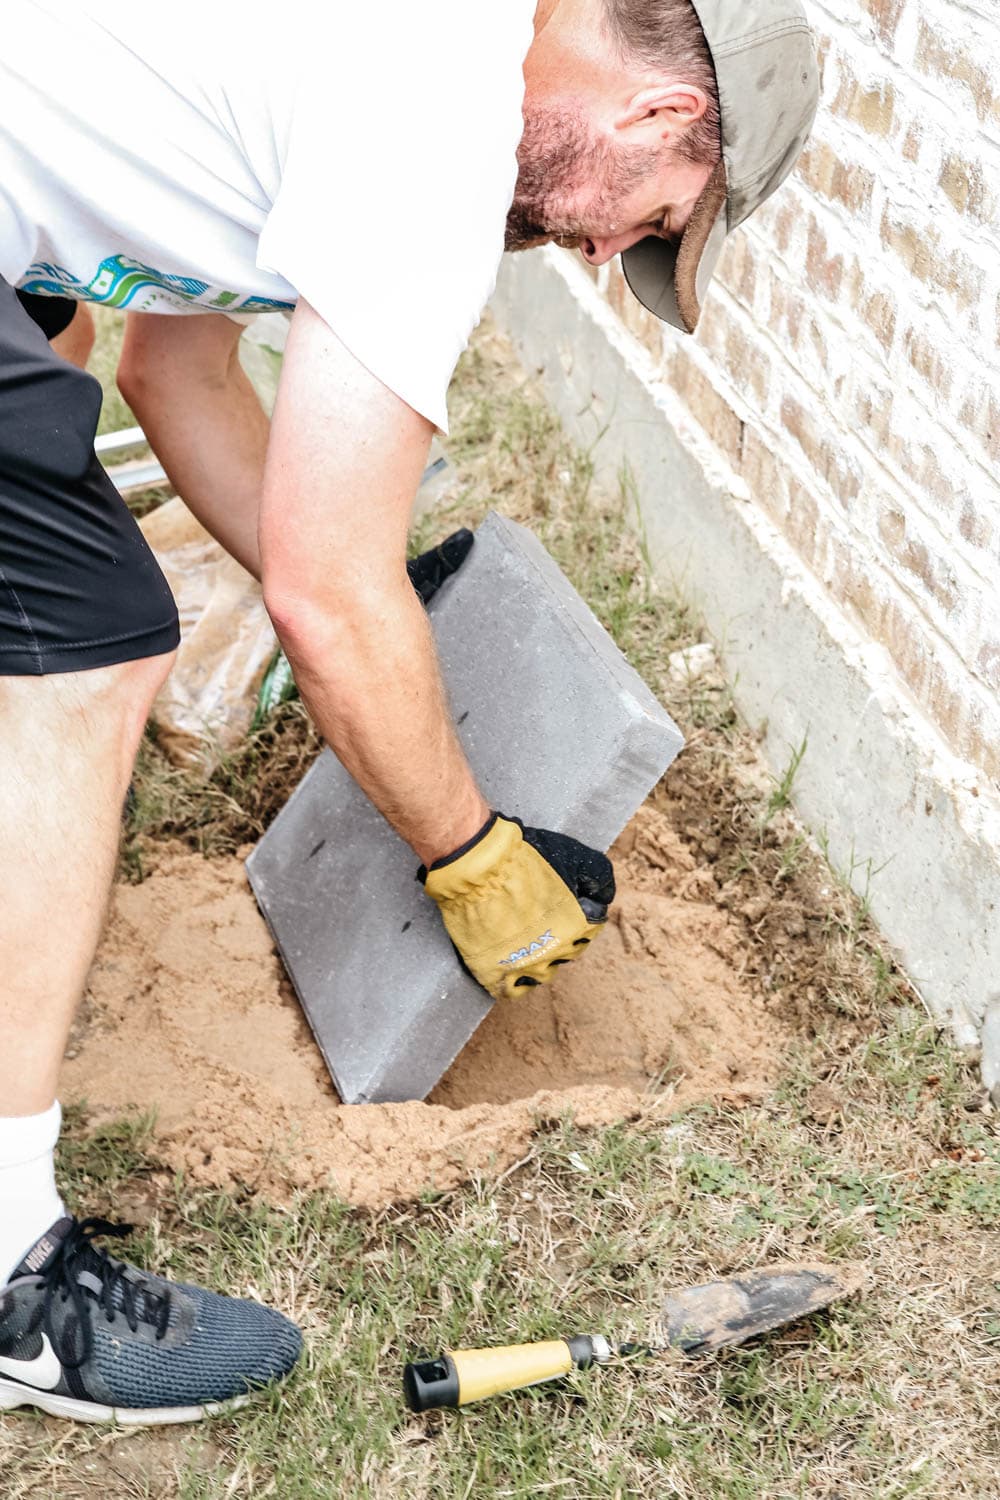
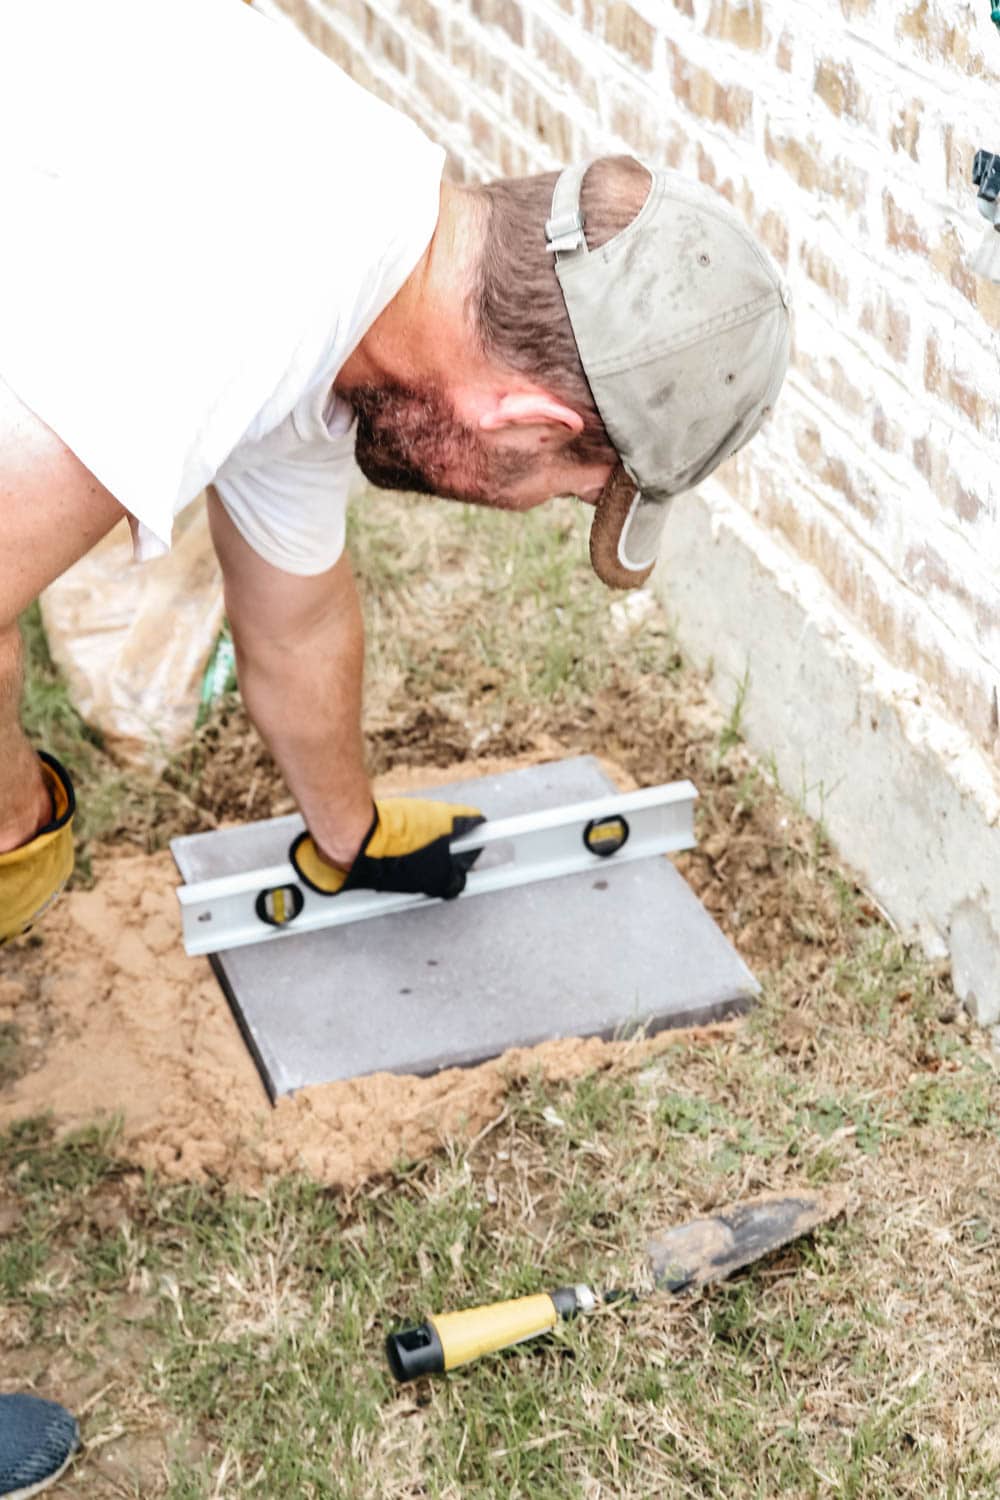
Step 4: Lay your paver
Next, lay your paver down on top of your smoothed-out sand. Pack it down real good.
You will see some sand ooze out of the sides and this is just fine.
Use your level and now is when you want to get it nice and flat.
If you are having trouble getting it to level out, you can either use a mallet and pound down the spots that are sticking up OR remove your paver and add more sand.
Once your paver is level, now it’s time to decide if you need your rain barrel raised up or not.
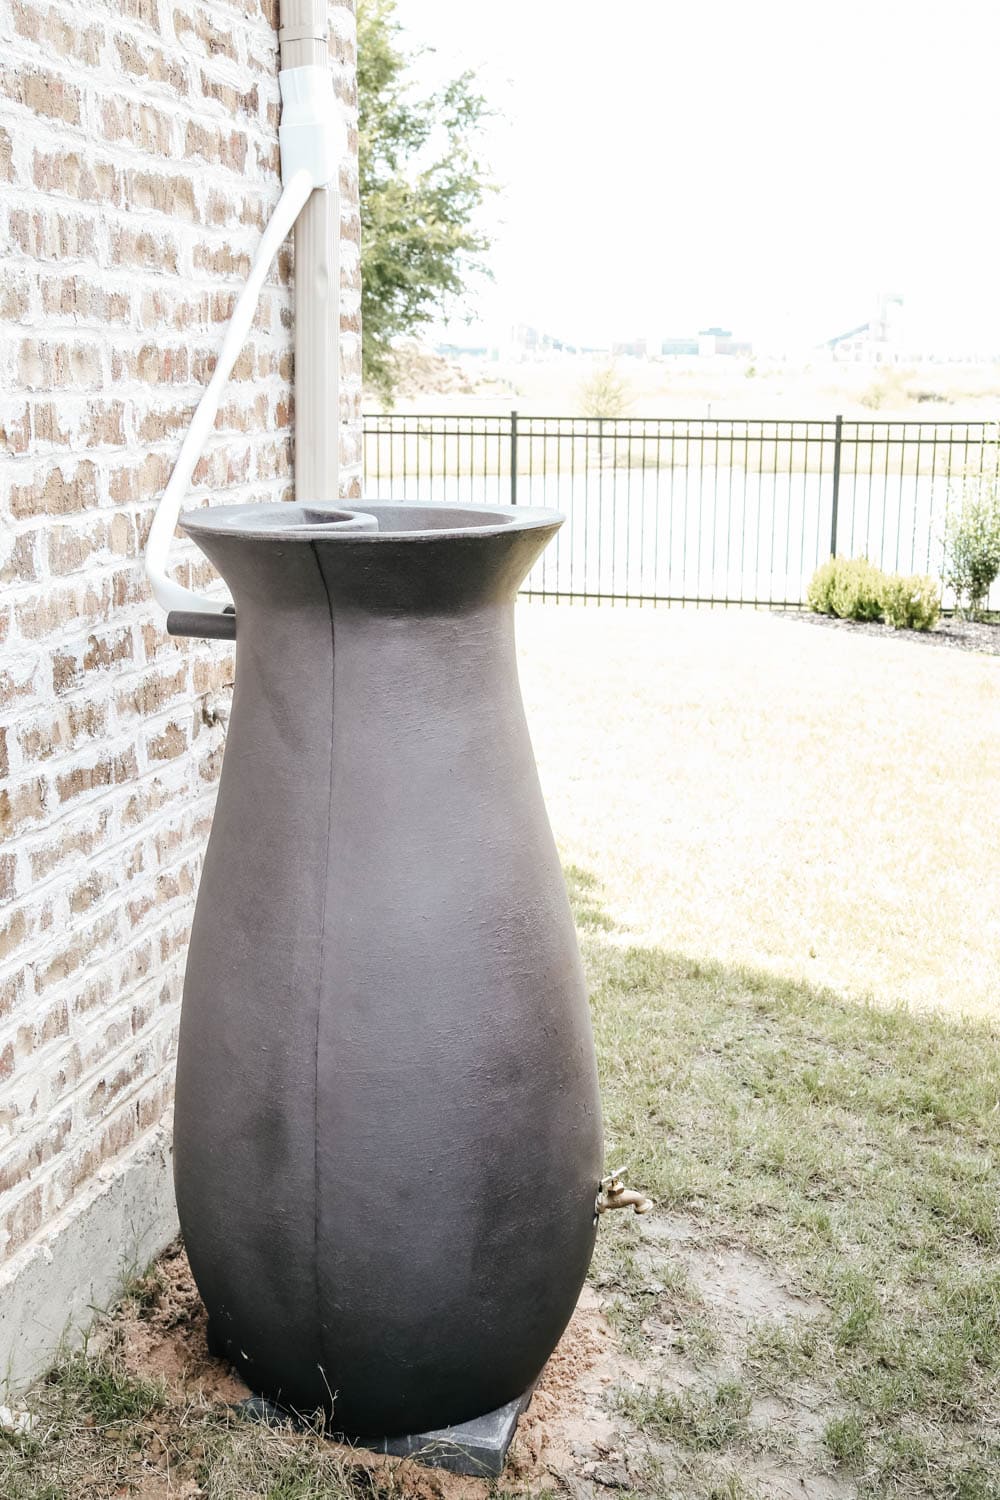
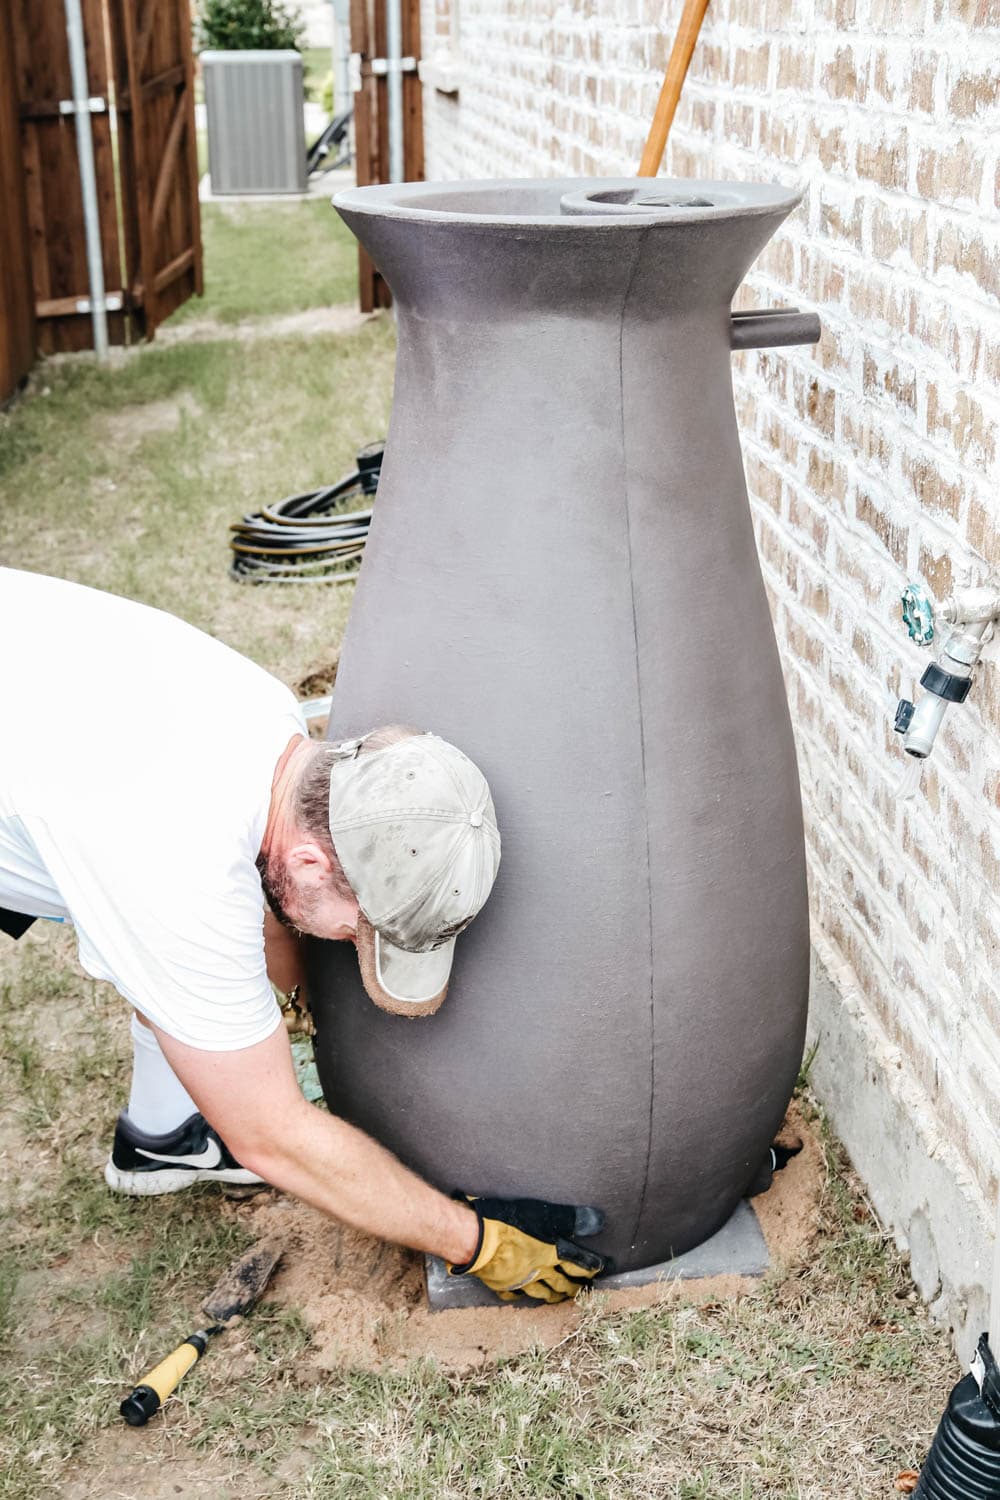
Step 5: Place your rain barrel onto your paver
Get your rain barrel into the position you are going to want it in. Decide what direction you want the spigot to go and make sure the drain on the back has room to be opened to let water out.
Would you like to save this post?
This is also typically where you would join using tubing to another barrel. So make sure there is room to access this for in the future if you want to add another one.
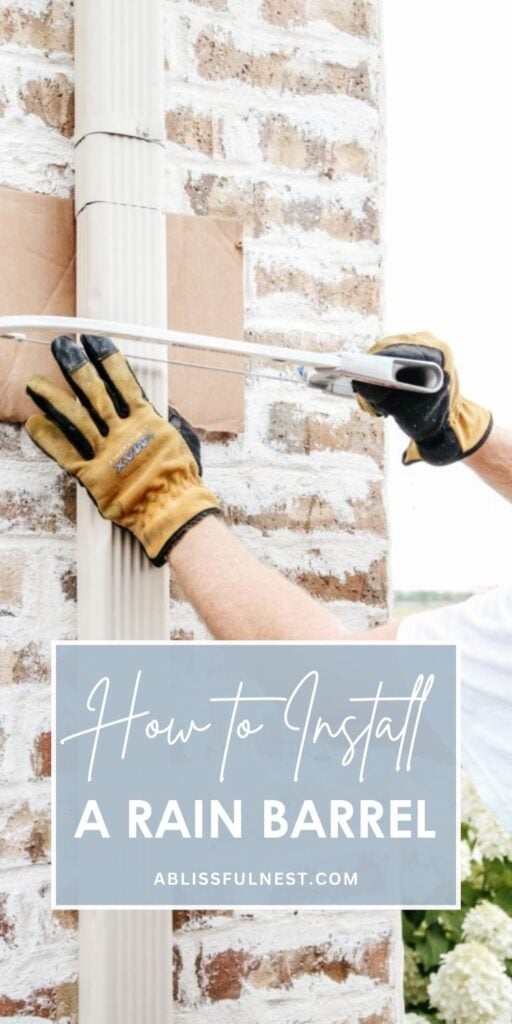
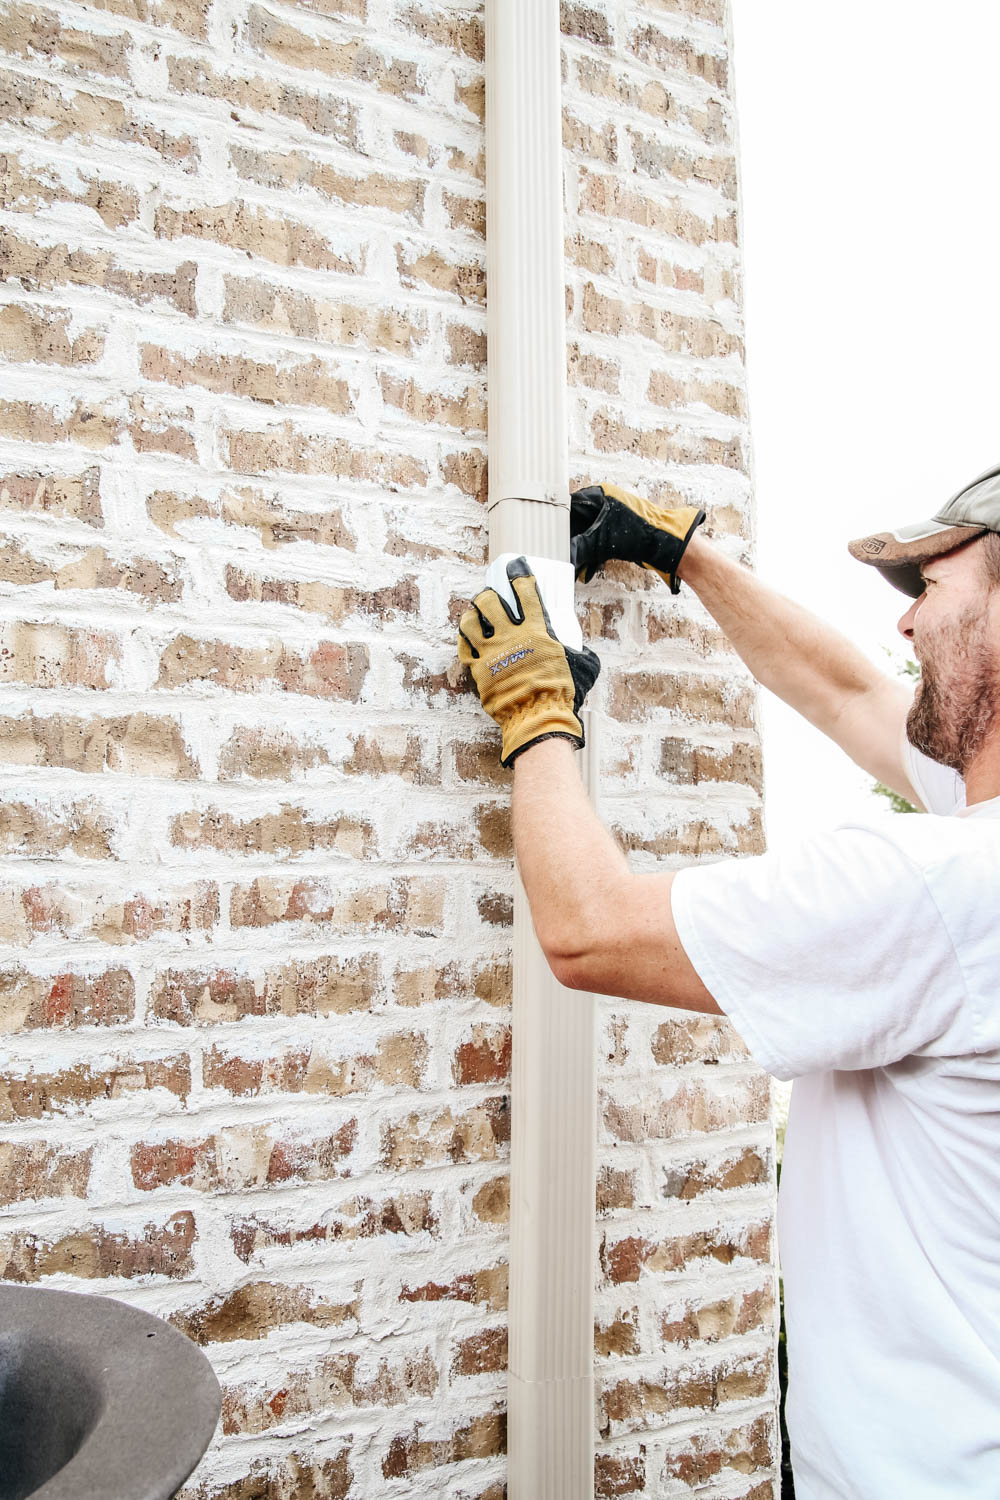
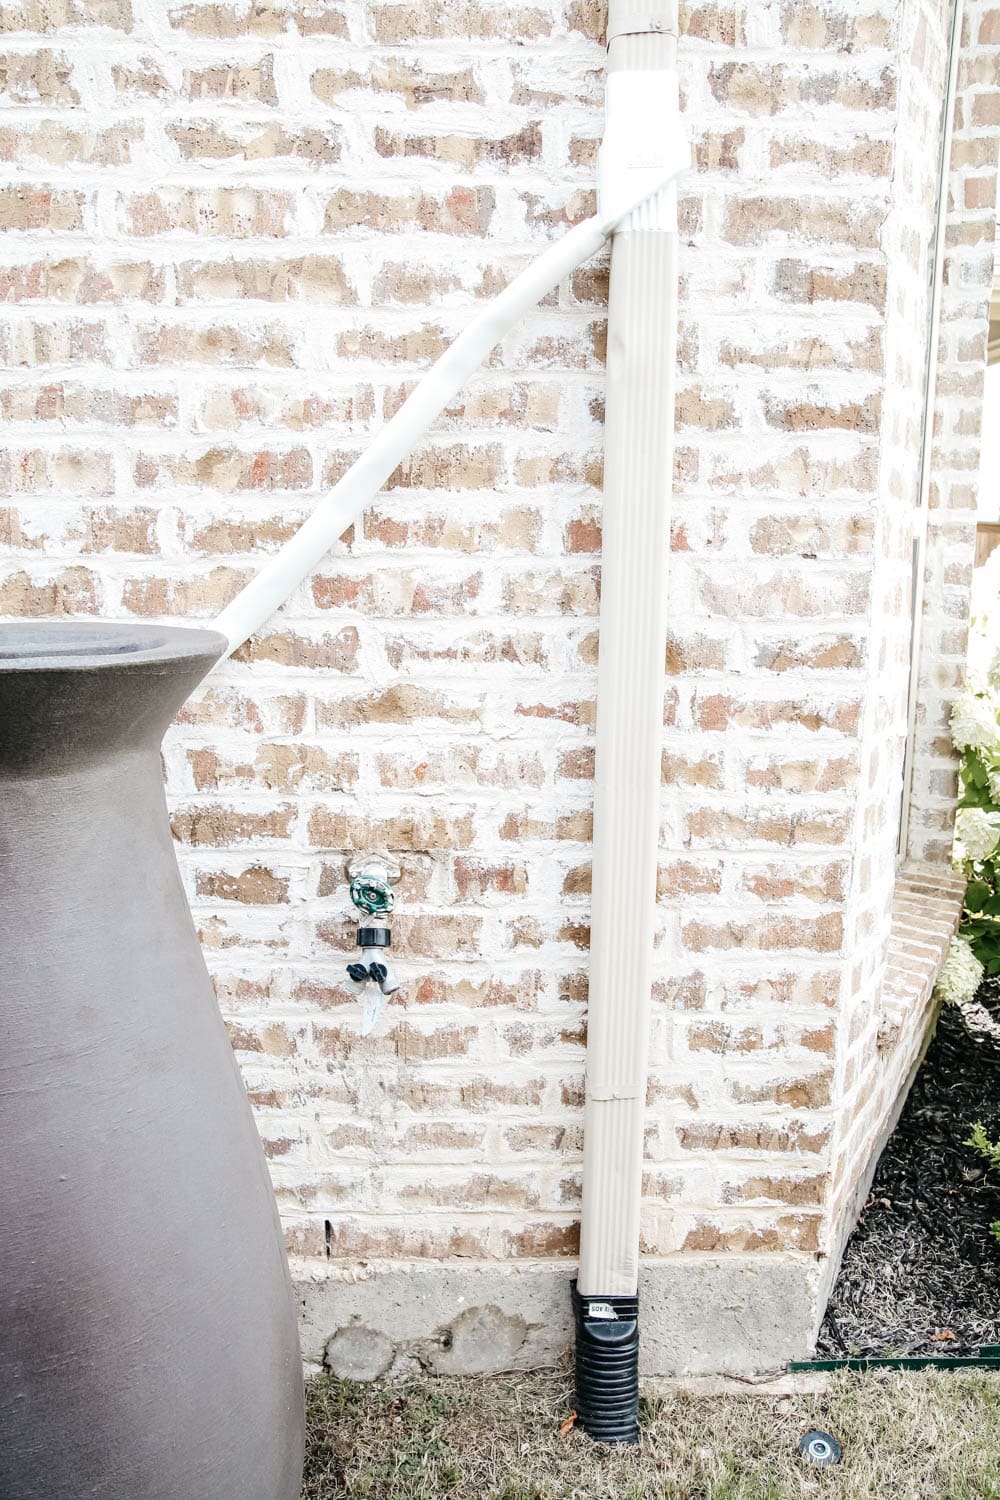
How to Attach a Downspout to a Rain Barrel
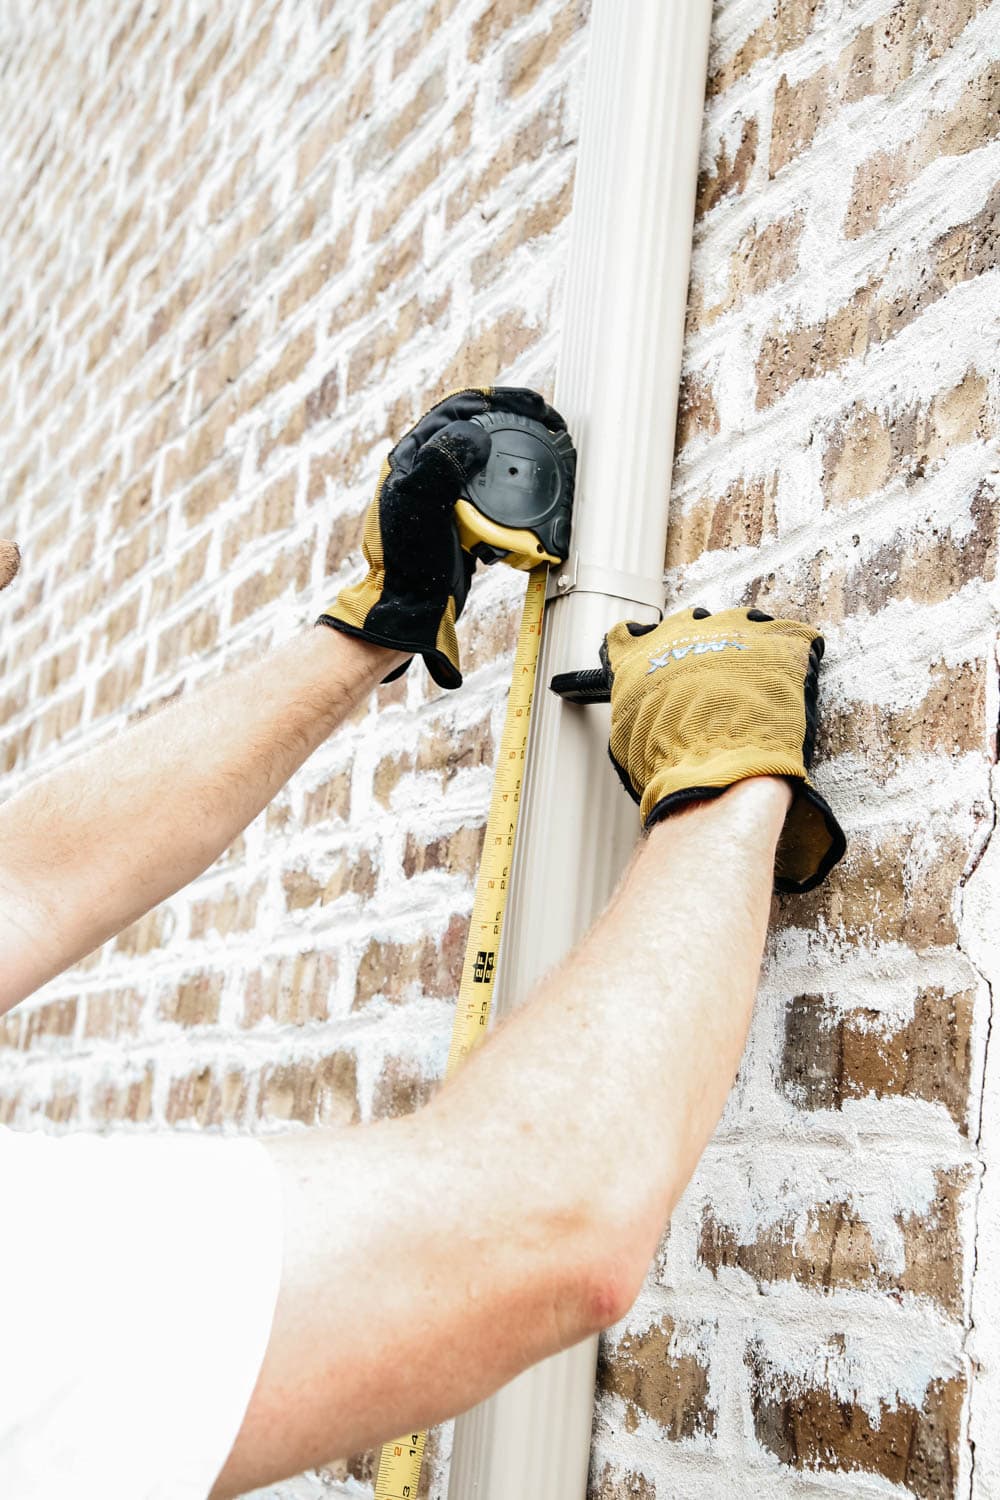
Mark the placement for the diverter on the downspout and cut the downspout.
As per the instructions of the diverter, it needs to be placed 24 inches above the rain barrel.
Use the measuring tape and a pen to mark the section of the downspout that will need to be cut.
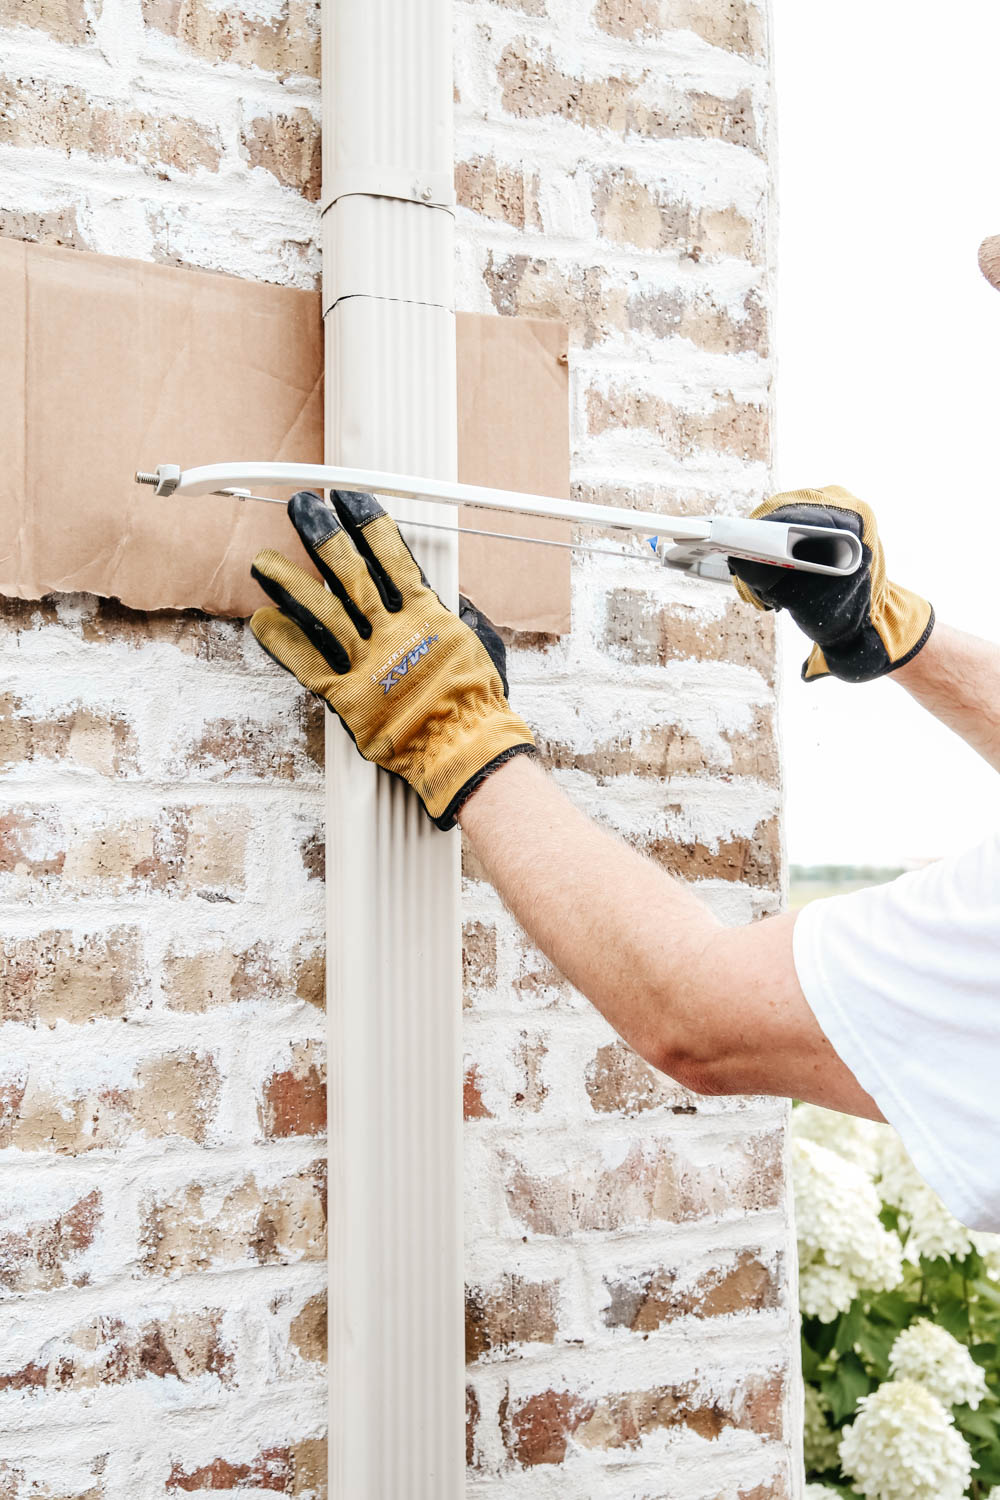
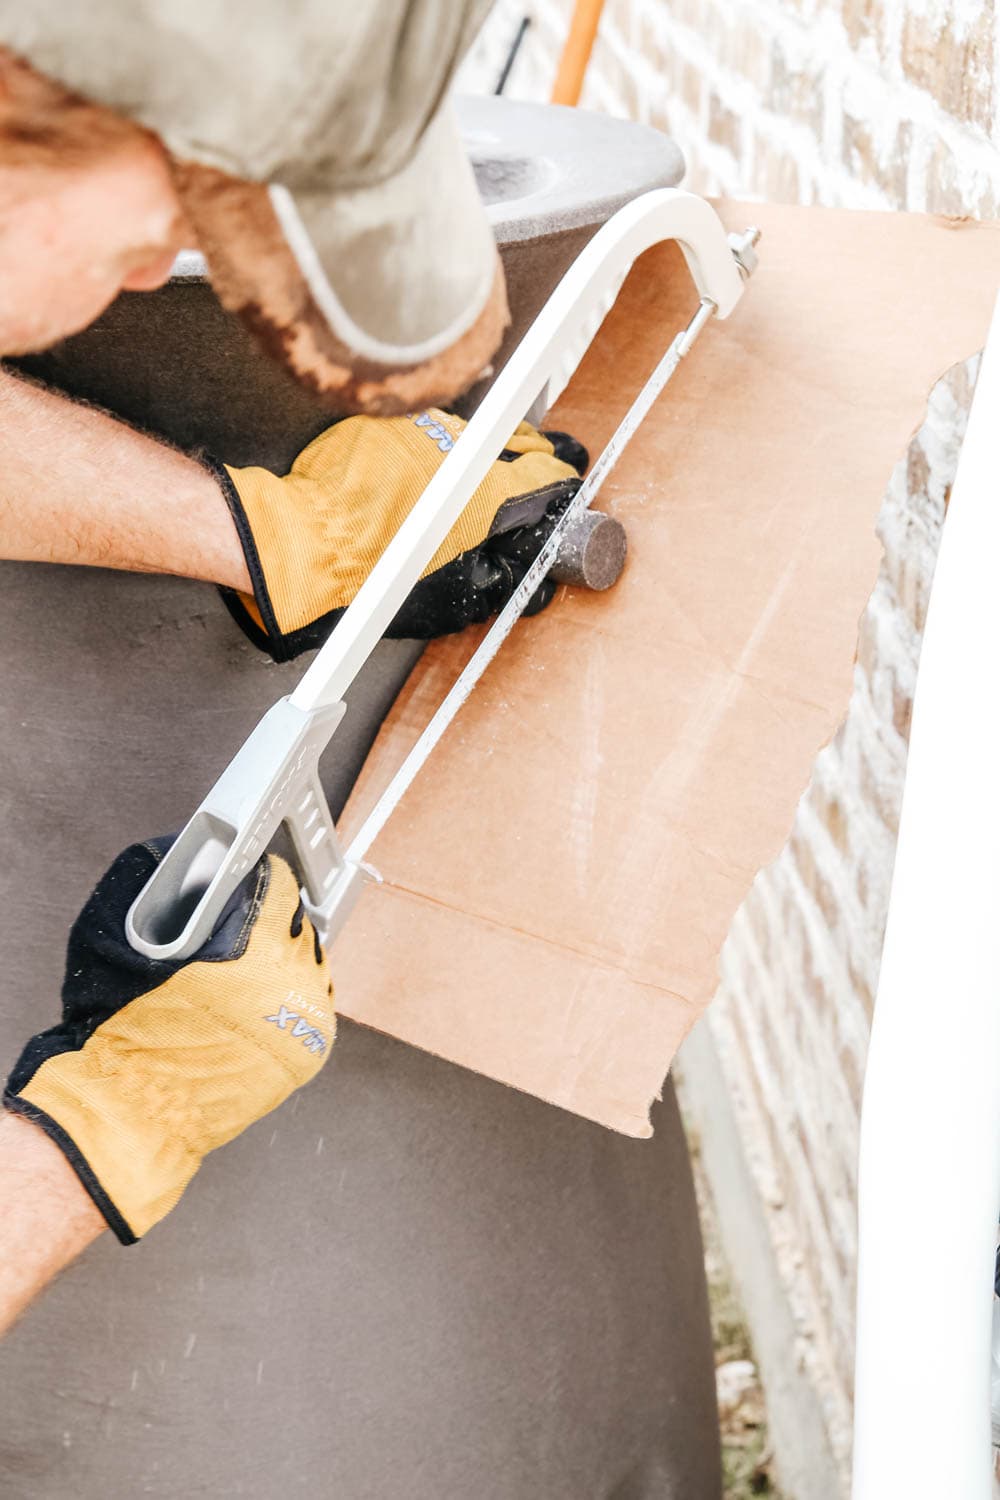
Use a piece of cardboard and slide it between the house and the back of the downspout. This will protect the siding of the house.
Use a saw and cut the marked sections of the downspout. You will have a six-inch gap in the downspout when you are done.
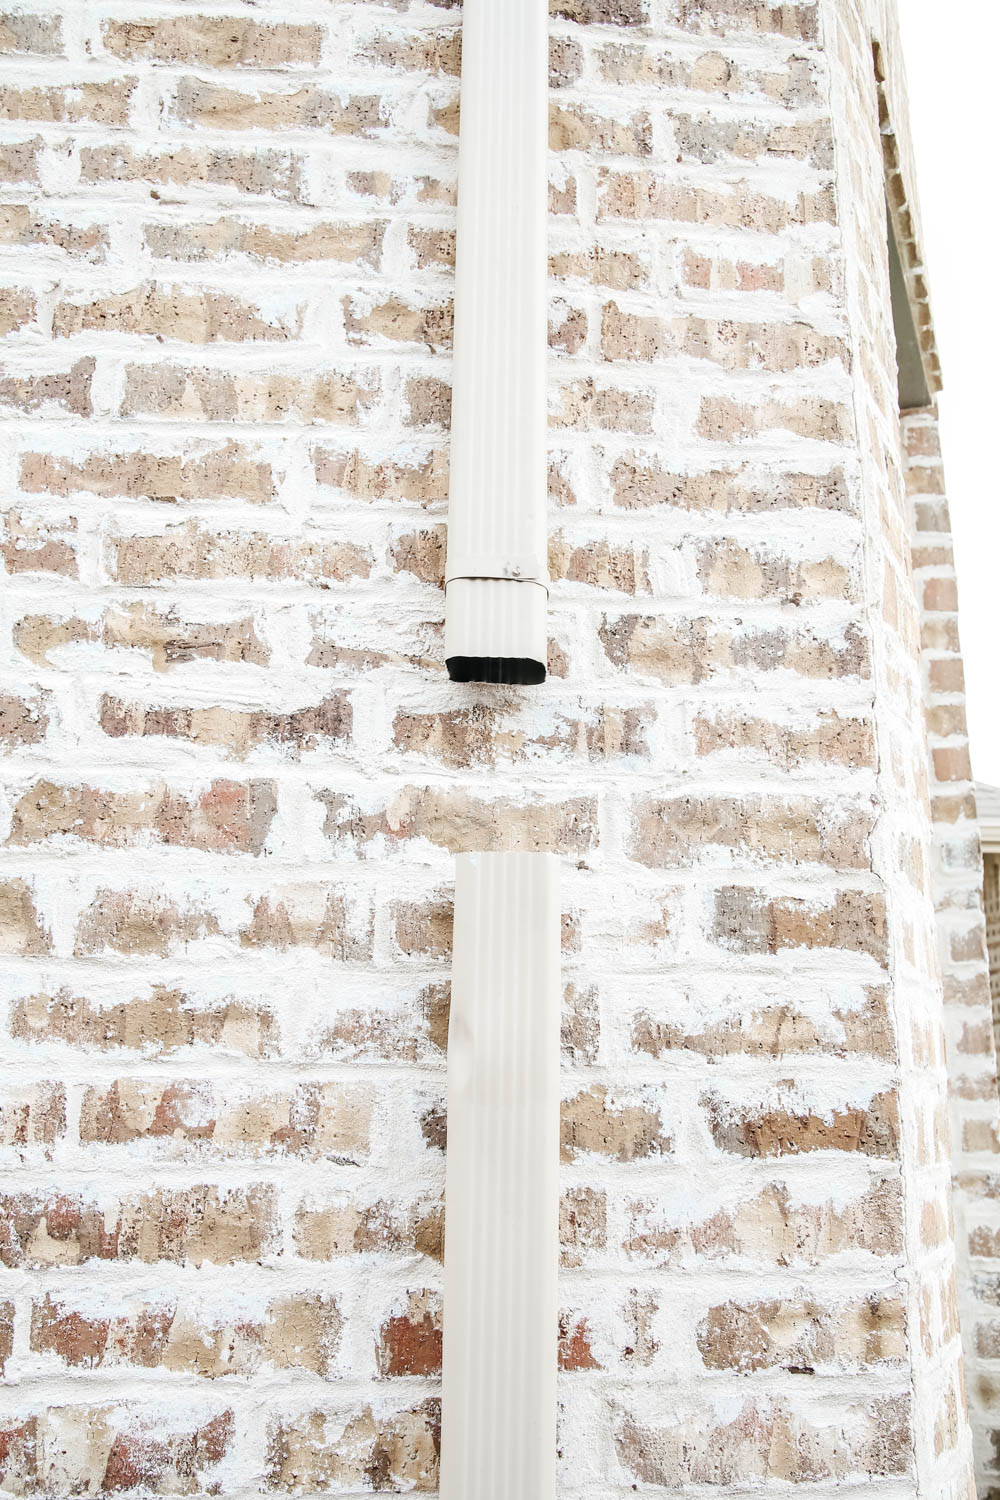
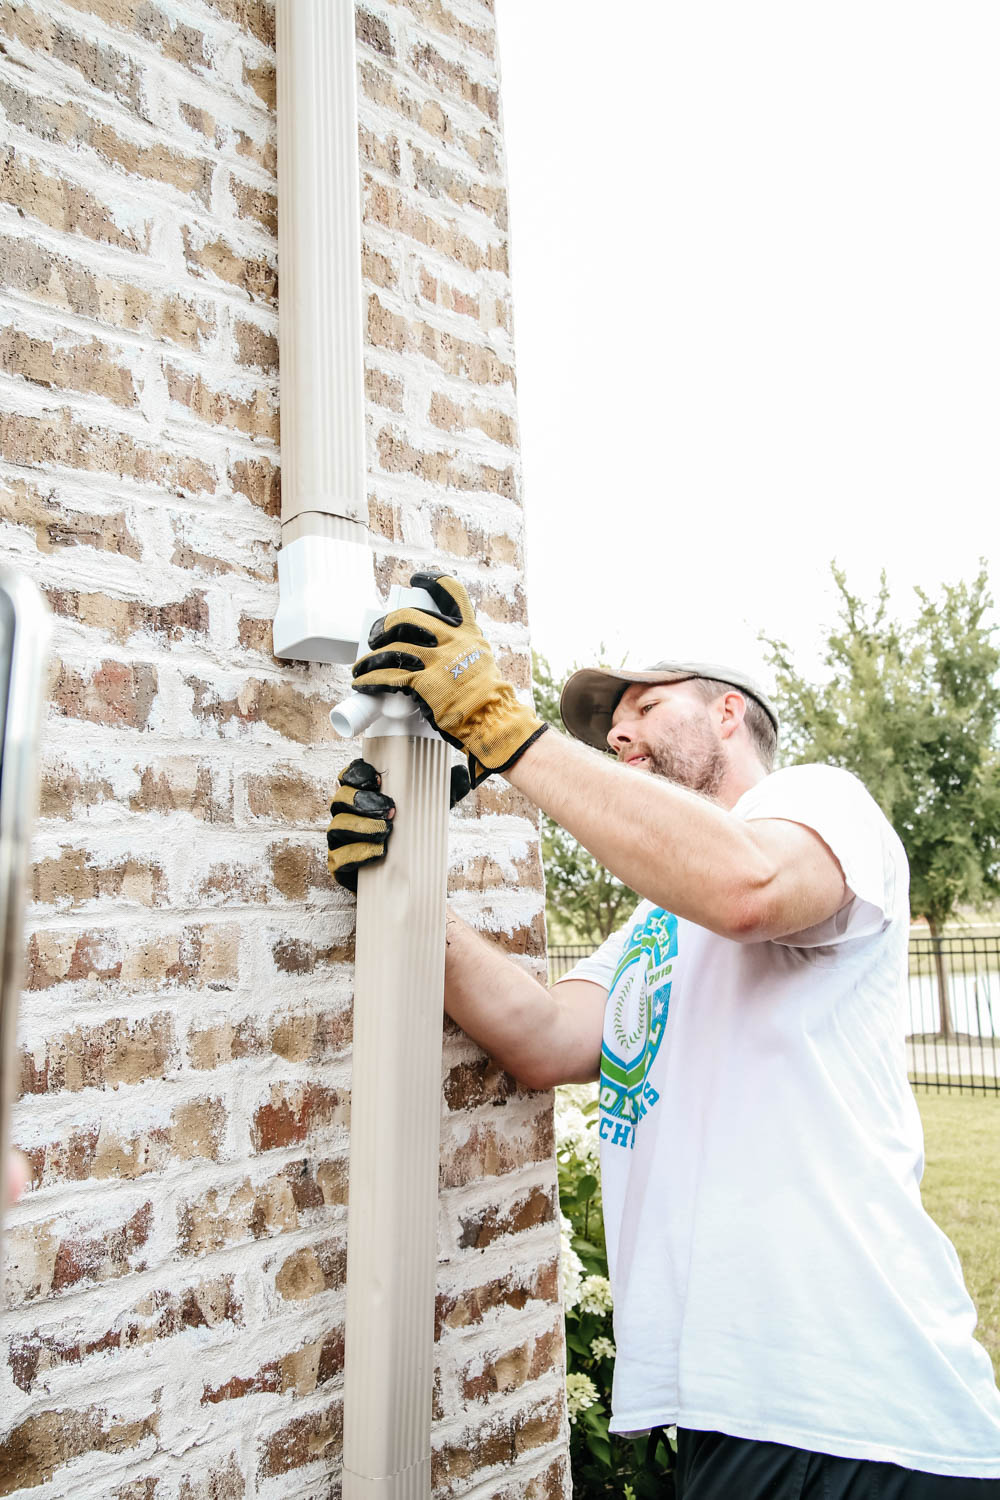
Slide the diverter onto the downspout.
The diverter comes apart in the center. Pull the two pieces apart and slide on the top part to the downspout.
Then slide the bottom part on to the bottom of the downspout and connect the 2 pieces.
You should have a snug fit and it should snap right into place.
More Outdoor Decorating Ideas + Inspiration
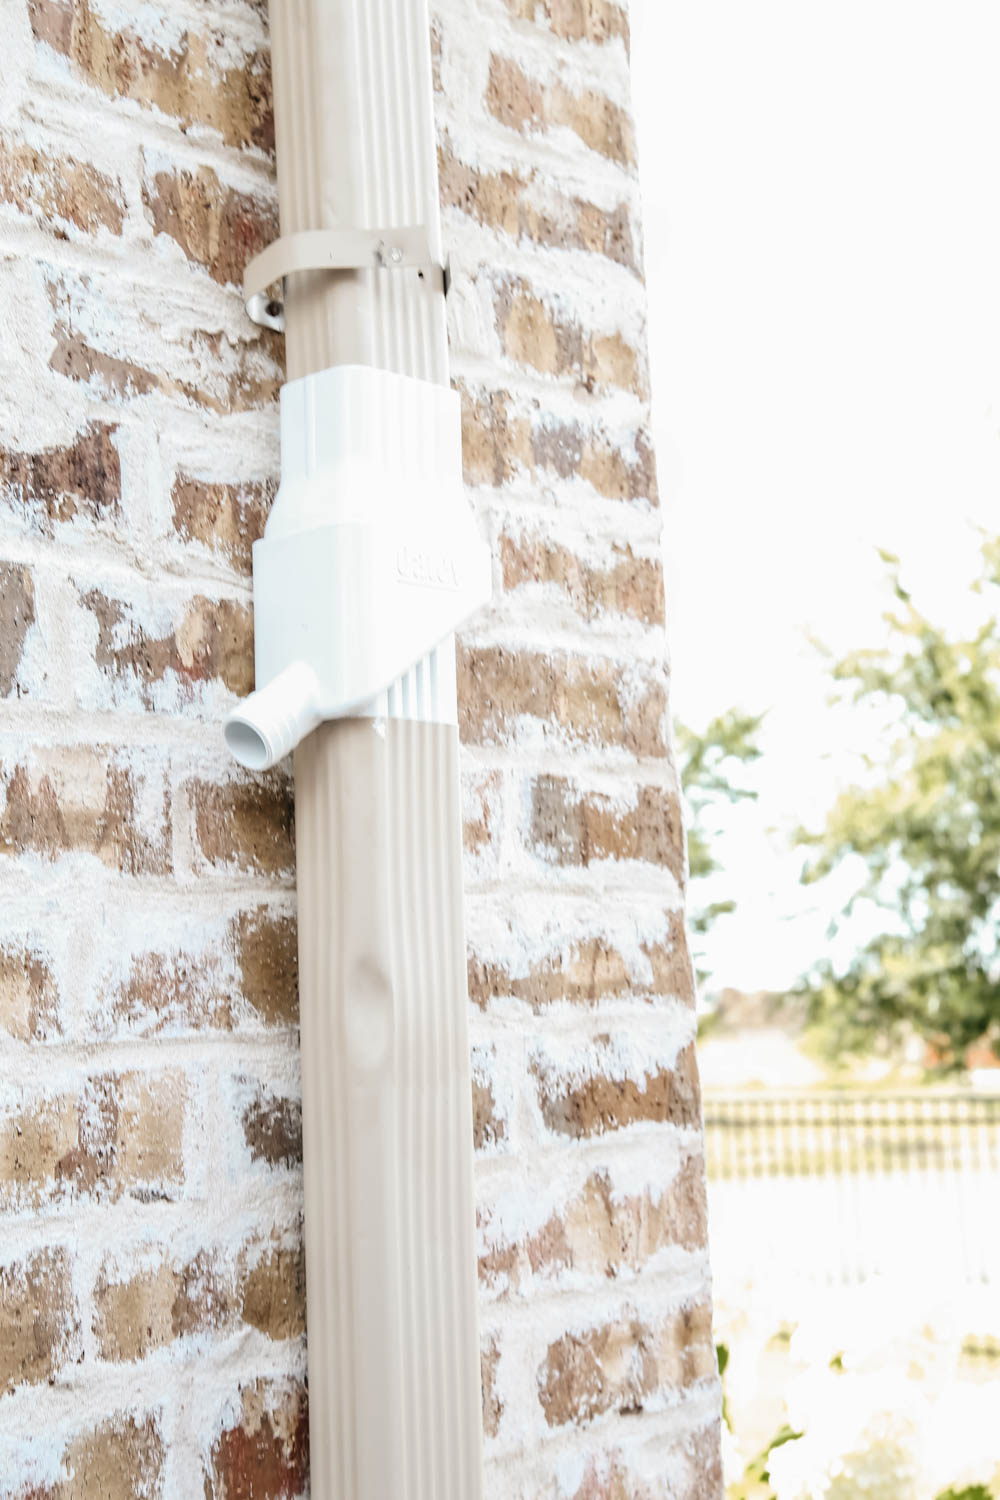
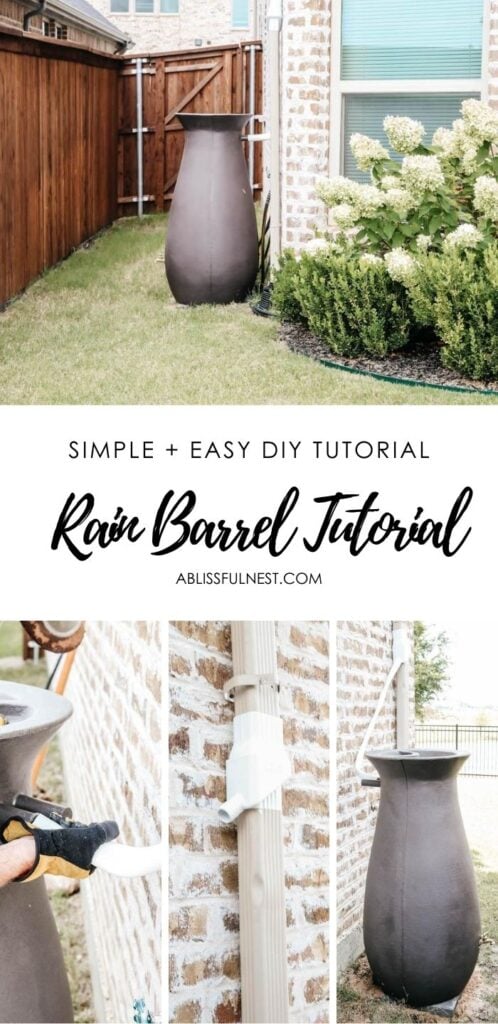
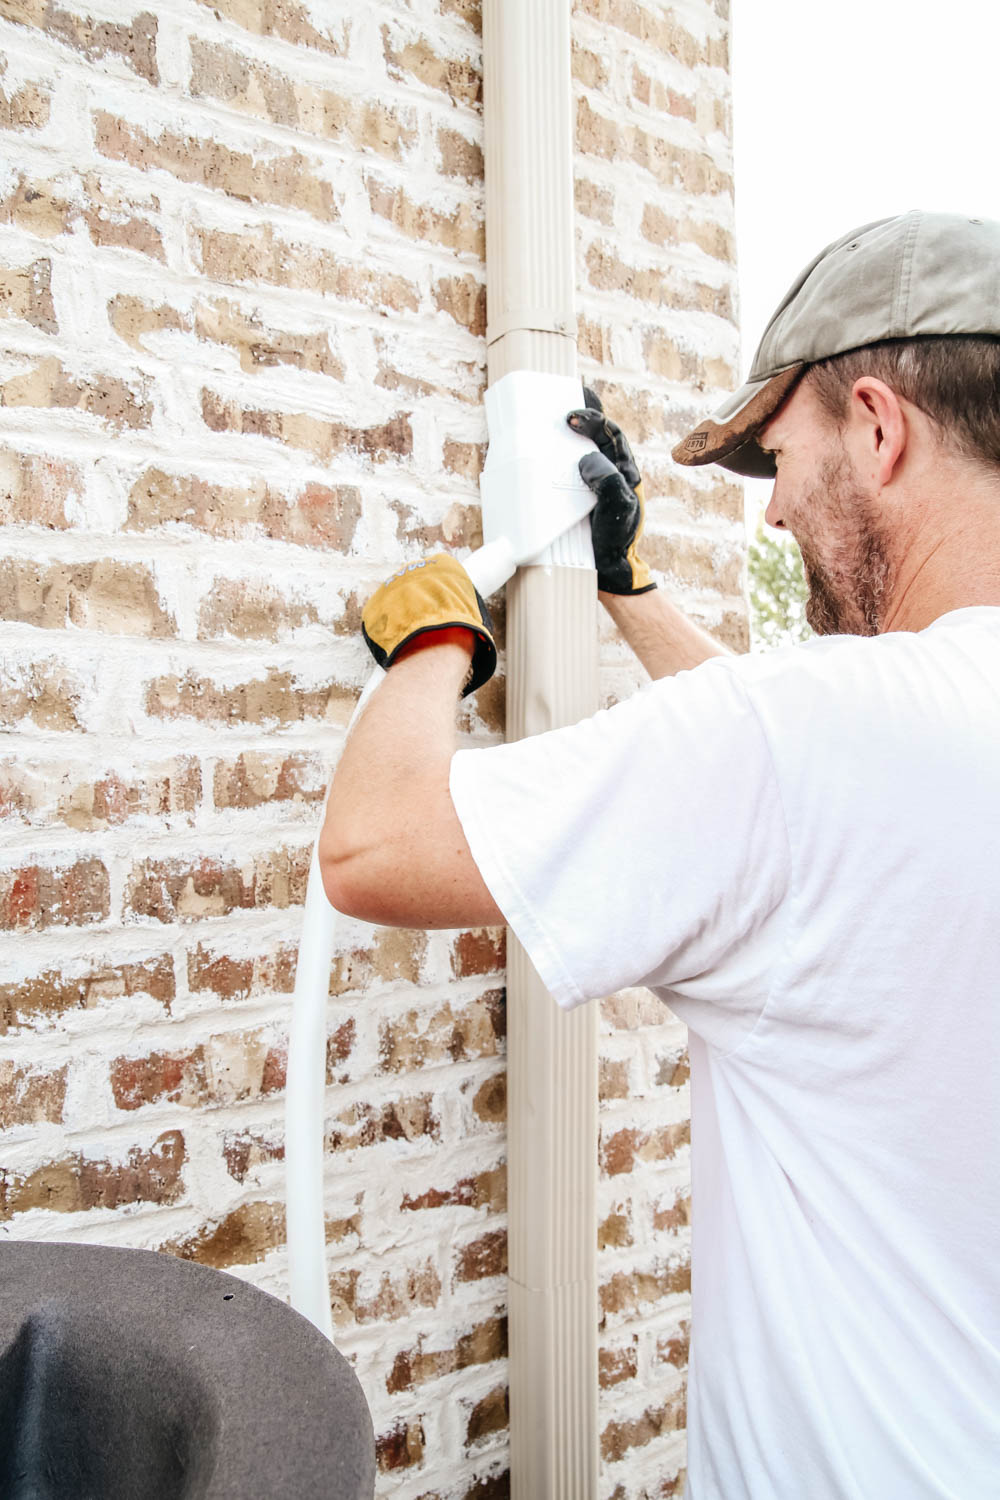
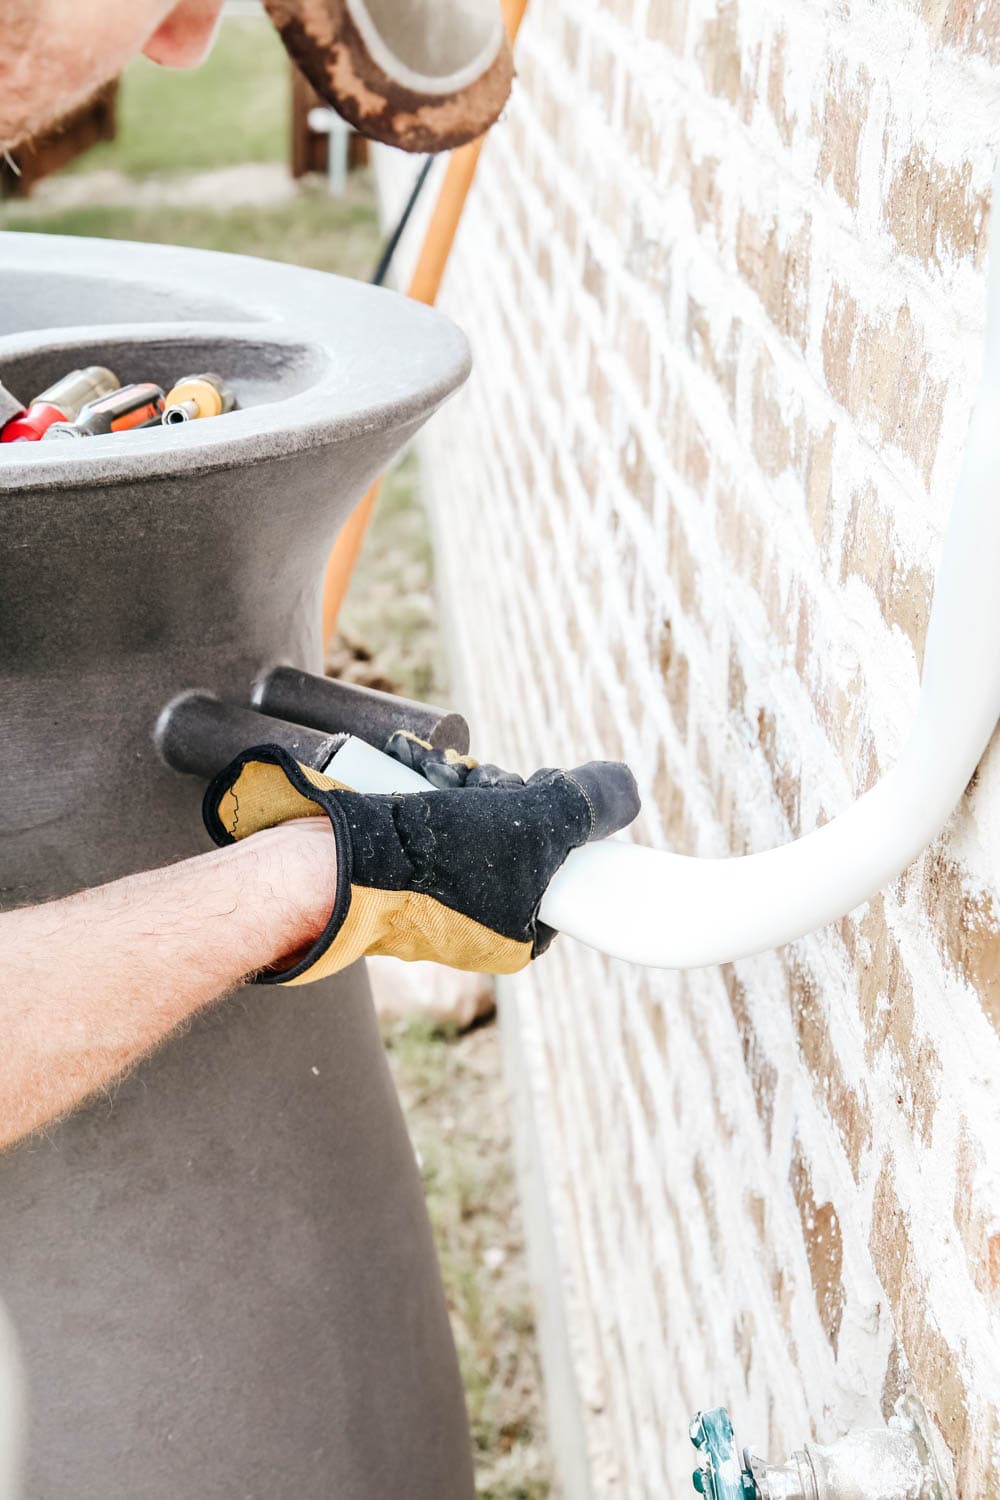
Attach the hose to the diverter and to the rain barrel.
Lastly, connect the hose to the bottom of the diverter and to the back of the rain barrel.
Make sure there is not a kink and the hose is fully extended so the water can run through without it being obstructed.
And that’s it friends! Really the whole thing took us 20-30 minutes from beginning to end.

General Guidelines:
Does a rain barrel need to be elevated?
This is going to totally be up to you. If you plan to just use a hose with the spigot on the rain barrel then you may not see a need to raise it. But if you would like to use a watering can or want more water pressure from the barrel, then yes you should raise it up at least 24″ off the ground.
How to raise a rain barrel?
There are a couple of different ways to raise a rain barrel. If you have some bricks or cinder blocks then you can add them on top of your paver. I actually really like this wooden stand and this resin basin. After you have done the steps above to create a nice flat surface, then you can easily place one of these right on top of the paver before you put the rain barrel down.
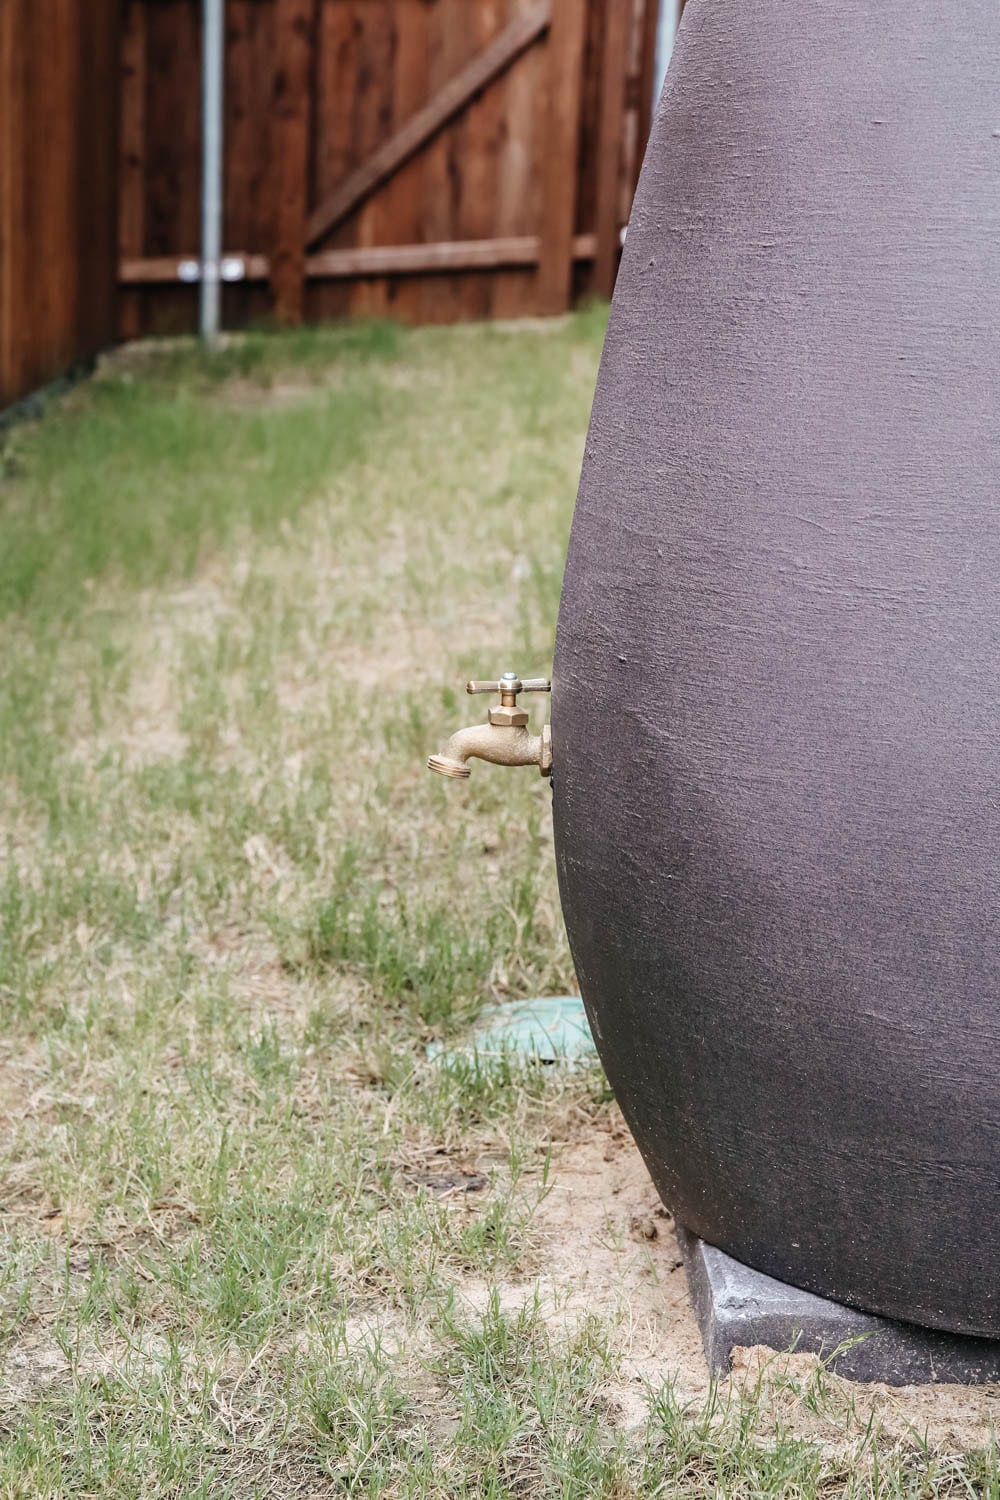
Can you attach a hose to a rain barrel?
You can definitely attach a hose to a rain barrel. You just need to do it towards the bottom of the barrel and with a spigot. Most rain barrels already come with them but you can get a spigot that has a universal fit.
How quickly do rain barrels fill up?
How quickly your rain barrel fills up will depend on how much it rains where you are but I love to use this from the Rain Barrel Man on how to generally calculate this?
“To calculate how much water your roof will produce, multiply the square footage of your roof by 600 and divide by 1000. As for harvesting the rainwater, that depends on how many downspouts you connect to and how large a system you have room for under each one.”
Do rain barrels attract mosquitoes?
If you purchase a good rain barrel, then there should be a mesh top on the top of the barrel so they can’t get in. If not you will want to add a mesh lining that’s about 1/16 of an inch to cover any open areas to your rainwater. You can easily find mesh at your local hardware store to do this.
How often should you empty your rain barrel?
You should empty your rain barrel before winter comes and freezing weather. You don’t want your barrels to crack from the expanding and contracting from frozen water.
Also, it is good to empty it after each storm season. This will help prevent bacteria from growing.
Use a long scrub brush and an even mixture of water and bleach to scrub the inside thoroughly.
A good time of year to do this is right after summer and before the fall rain season.
You most likely will not be using your rain barrels from fall through the winter and should have the diverter off to redirect your gutter water.
Frequently Asked Questions
How do you install a rain barrel on a downspout?
Set the barrel on a level base beside the downspout and mark the inlet height. Cut the downspout, attach an elbow or diverter, then aim water into a screened top opening and check for leaks.
What do you put under a rain barrel?
Place pavers on compacted gravel so the barrel stays flat and steady. Raise it about 12 inches on blocks or a stand to fit a can under the spigot and improve flow for easy filling.
Do rain barrels need an overflow hose?
Add an overflow outlet or hose near the top so extra water exits before it spills by your wall. Run the hose to a rain garden or slope at least six feet from the foundation.
What do you put at the bottom of a rain barrel to prevent mosquitoes and debris?
Use a tight lid and 1/16 inch mesh screen on the inlet and any vents to block mosquitoes and leaves. Drop a Bti mosquito dunk in the water and clean sediment from the bottom yearly.
Are rain barrels legal or do you need a permit in your state?
Check your state and city rules because rainwater laws vary, and some places limit barrel size or use. Simple outdoor barrels often need no permit, but indoor plumbing connections may require permits and backflow protection.
I hope this guide helps you confidently install a rain barrel and start collecting water in a way that is good for your garden and your wallet!
Gather your supplies, and pick a weekend to get outside and make it happen because it is truly a project you can complete in just a few hours.
Taking this simple step helps you cut down on your water bill, reduce runoff in your yard, and give your plants the natural rainwater they absolutely love.
Once your rain barrel is set up and ready to go, you will wonder why you did not do it sooner because the results speak for themselves every time it rains.
Trust yourself, take it one step at a time, and enjoy the feeling of knowing you did something great for your home and the environment!

